5 Tips for a Successful Canvas Course Site
By now, most of you have hopefully begun to create a course site in our new LMS, Canvas. I found a helpful resource in the Canvas Community written by a colleague that inspired me to create a similar list for WPI faculty.
1 – Customize your Canvas Notifications
- Notifications in Canvas are set globally (not course specific).
- You can change settings to ASAP, Daily, Weekly, or Never.
- You will not automatically receive a notification of emails you’ve sent or Announcements you’ve posted. Follow the steps below to change this!

Take Action
- Customize your notification settings to suit your needs. Go to Account > Notifications to review what you currently have set.
- Check if additional methods of communication are needed – do you often use your cell phone to check Canvas? Push notifications can also be customized here. Add your cell phone information on your Profile Settings page.
2 – Update your Syllabus page
The Syllabus page has a tool that allows students to view all graded activities in one place. Any time you create an assignment or activity with a due date in Canvas, it will automatically populate into the Syllabus tool.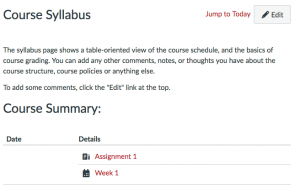
Take Action
- Post your course Syllabus either as a file or copy and paste from Microsoft Word directly into the Rich Content Editor.
- Make sure you add due dates to graded activities so they are organized here for students.
3 – Make your Course Easy to Navigate
All materials and activities within Canvas are organized into types. The left hand navigation in your course site shows you all course elements of a certain type no matter where it falls in your course sequence.
Organizing your course site using this navigation will help your students find your resources quicker and easier!
Take Action
- Organize your course into modules. Modules allow you to organize your content to help control the flow of your course. They are used to organize course content by weeks, units, or a different organizational structure that works for your course.
- Add content, files, web links, assignments, and activities to each module in sequence of how students should be accessing course activities.
- Organize your files into folders with consistent and easy to identify naming conventions. Or, completely hide your Files area from students if you do not want them to see every file you’ve uploaded to your course site.
- Hide navigation links that you are not using from students. Hidden navigation links can be unhidden at any time. The links you choose to keep in your menu should be determined by the tools you need in your course site.
- Set your Homepage. There are several options to set as your homepage: Course Activity Stream, Customized Page, Course Modules, Assignments List, and Syllabus. Create a customized page with module buttons!
4 – Communicate with your Students

Use Inbox or Announcements to communicate with your students. Discussion boards (Canvas or Piazza) also offer flexibility to have students communicate with each other as well as with the professor.
A Q&A discussion on Piazza can also help alleviate time spent on answering the same questions over and over.
Take Action
- Choose which tools you will to use to communicate with your students. Be consistent with how you use the tools to help temper student expectations.
- Inform your students of your preferred method of communication. Will you use Canvas Inbox? Or Announcements? Or set up a Q&A forum on Piazza?
- Set expectations for turnaround time. How often will you check email and respond?
5 – Check your Course Site for Accuracy
When you’re crunched for time it can be tough to find even just a few minutes to review the wealth of resources, assignments and quizzes you’ve created in your course site. But before you hit that Publish button, check out these time saving tools Canvas has to help your course site be the best it can be!
Take Action
- Enable Student View (Settings > Student View) to make sure everything that should be accessible is, and things you don’t want students to see are not.
- Review the due dates posted in the Syllabus tool – Canvas gathers them all in once place for you in an easy to review table format. This is especially important if you copy your course content from year to year.
- Use the course link validator to locate broken links. Settings > Validate Links in Content
- Make sure your bio and contact information is up to date. Go to Account > Profile to do this.
- Check for Green: everything that should be published for student viewing should be green (or have a cloud icon with a checkmark in it).
That’s it! I hope you find this helpful. As always, if you have any questions or want a Canvas training, contact Team ATC-TTL, we’re always happy to help: atc-ttl@wpi.edu or stop by and see us in Gordon Library 225.
Credit to Bryan Hauf @ University of North Texas Health Science Center.