ECG lab: Arduino and display code
The ECG lab uses an Arduino to record amplified voltages from the ECG circuit, and displays them on a computer using a Processing script.
STEP 1. Arduino code (to set up your Arduino, one time)
The Arduino code does two things:
- It reads in a voltage (at input A0) and converts it to serial data, which is sent via USB cable to the display computer, and
- Establishes an oscillating square-wave signal that is used to test the circuit and to learn about amplifiers and filters.
To load the code into your Arduino, follow these steps:
- Connect your Arduino via USB cable
- Download and install the Arduino IDE program (LEGACY VERSION 1.8: scroll down!).
- Download and install Arduino IDE Software at: https://www.arduino.cc/en/Main/Software. Choose your platform. I recommend using version 1.8.19, not 2.0 which is currently buggy. It might work or might cause trouble…
- Run the Arduino IDE software. A window will open with an editable area to insert code.
- Select the default code in the window and delete it.
- Copy the code below into the empty Arduino window. Save it with the name “bme2210”
- In the “Tools” Manu, select “Board” and “Arduino/Genuino Uno” and then “Port” and the correct USB port. On Windows, this looks like “COM3” or another number; on Mac OSX it looks like “/dev/cu.usbmodem144111” or another number at the end.
- Write down your Port name. You might need it later.
- Select the right-arrow button at the top left to upload code to the board. Save the code with a name like “bme2210” or whatever you like. Orange lights should flash on the board (as it uploads) and a few seconds later, the message near the bottom of the code window should read “Done uploading.“
STEP 2: Processing code (to display circuit voltage on your computer)
The Processing code displays the voltage recorded by the Arduino, for example the ECG trace. It reads in the serial data from the Arduino, and displays a moving graph of voltage over time. There are options to pause and save the data and images.
Download a stand-alone, pre-compiled “Oscope” program.
- Download the stand-alone, complied program for Windows 64-bit (140 Mb!) or Mac OSX (145 Mb!) or Apple M1+ (6 Mb). Right-click the link and choose “Save link as…” and “Save” to the desktop or other location.
- Then find your web browser downloads icon (usually lower left or upper right). Click and choose “Keep”
- Uncompress the folder by opening the zip file and dragging the Oscope_2023 folder to another location (e.g. desktop), or select “Extract”. Note that this step can take a long time, >10 min! Only needed once though.
- Plug in your Arduino, having completed the setup steps above (Step 1), via USB cable.
- Open the folder and and run the file called “oscope_2023.exe” or “oscope_2023.app“.
- Right-click the icon and select “Pin to Taskbar” so you have easy access!
Alternative Option (if the steps above don’t work): Download the Processing software environment and run the “Oscope” code:
- Download and install Processing software (version 2.2, scroll down a bit. ~110 Mb). It’s important to install the older 2.2 version as the course script uses code that is not supported in version 3. Choose your operating system, e.g. Windows 64-bit, or Mac OSX.
- Download the Oscope code below, depending on your computer:
- Mac: Oscope_2015_mac.pde
- Windows (normal screens): Oscope_2015.pde
- Windows (super-high resolution screens): oscope_2023.pde
- Right-click the link, Save as…, and run the code. Processing will ask you to make a folder (Click OK). Then run the code by pressing the Play arrow.
If successful, you’ll see a moving graph with a voltage display. It might look like an exponential curve, or a bunch of noise, until you build a circuit!

Sample output
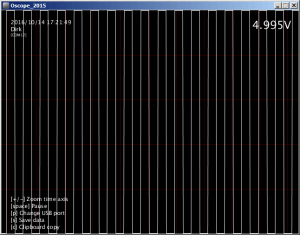
0-5V square wave test signal
Visit this site if you’re interested in some other Arduino-based applications!

Arduino ECG by DRA is licensed under a Creative Commons Attribution-ShareAlike 4.0 International License.