I’m not kidding when I say that three faculty members have approached us very recently with a similar teaching challenge: How can I use technology to help with team assessment? And here in the TTL group, we LOVE a challenge.
Each professor has slightly different needs, however all centered around the desire for students in a group to give feedback on their group members. Some are interested in qualitative feedback. Others want a more quantitative method, which would allow group members to divide up the “percentage of effort” among the team. We are looking forward to more discussions on this latter topic, especially as we role out a new method later this summer. But in the meantime, because WPI is project-based and their are 12 days of classes left in the term (12 DAYS?!?!), we thought that this “work around” for group feedback in myWPI might be useful.
The myWPI Self and Peer Assessment tool is designed for students to give feedback on other individuals’ work. So let me please be clear that the methods described below to use the tool merely for comment gathering is very much gaming the system. However, we think it works!
Using myWPI’s Self and Peer Assessment Tool to Gather Feedback on Group Collaboration
Step 1: If you haven’t done so already, use the Users and Groups tool to create a Group Set, then enroll all of your students in their correct groups. This will save a lot of time later.
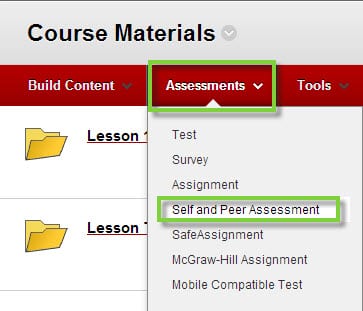
Step 2: Navigate to the Content Area in which you would like to deploy the Assessment. Click Assessments –> Self and Peer Assessment.
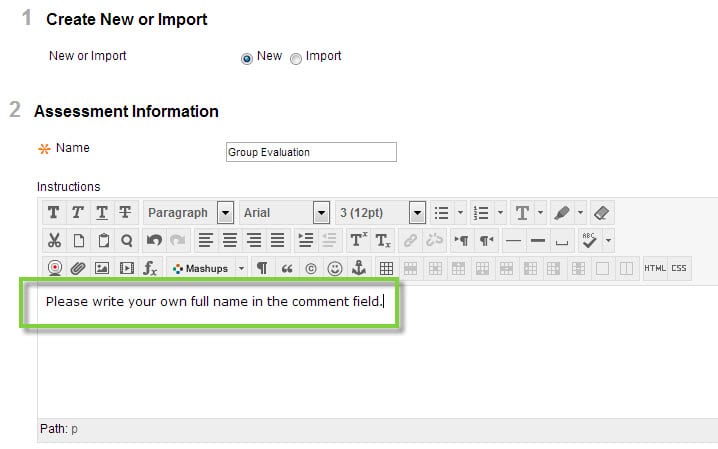
Step 3: Fill out the relevant information about the Assessment. In the Instructions text box, we suggest that you ask students to write their own name.
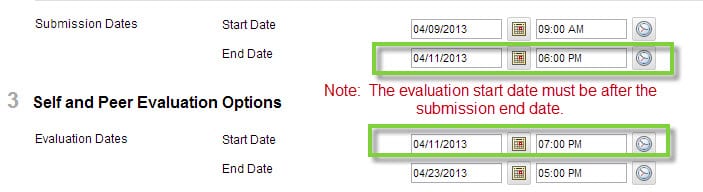
Your students will be required to take action during the Submission Date range, so maybe give them a day or two on that calendar. However, most of the work will take place during the Evaluation Date range, which can only begin after the Submission Date range is complete.
The next settings are completely up to you. If you want to know who said what, do not allow anonymous evaluation. If you do not need the student to evaluate him/herself, you can also disable Allow Self Evaluation. Finally, you can choose whether to display the comments to the students.

In the Number of Submissions to Evaluate, be sure you list the number of students in the group. When in doubt, go with the highest number.

Choose the availability settings and you’re ready for Step 4!
Step 4: Create a Question.

In the Question Information section, instruct the students to write their full name. You do not need to enter a Model Response.

Click Submit.
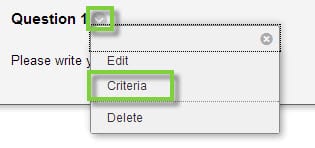
Mouse over Question 1, click the action link for the drop down menu, and click Criteria.
Click Create Criteria.

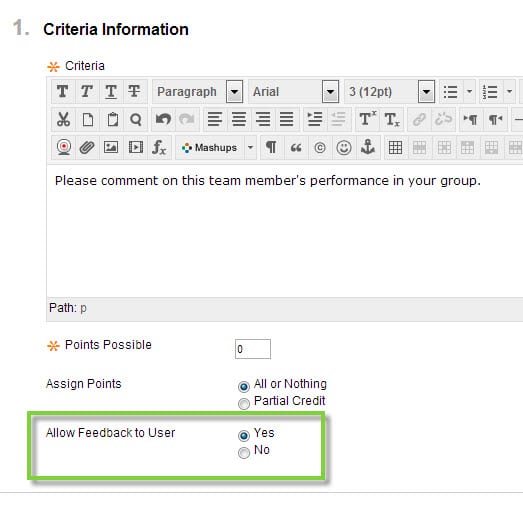
Enter instructions to the students who will be evaluating and choose the settings that are important to you. For example, you may not be interested in numeric feedback. If that’s the case, you can set the Points Possible to 0. However, if you want the students to comment verbally, be sure to enable the Allow Feedback to User option. Whether the student being evaluated can see these comments is actually a setting you chose in Step 3 above.
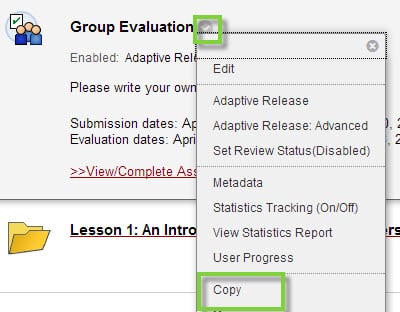
Step 5. Make copies of the Assessment – each group will need one. Click the Action link on the Assessment title –> Copy.
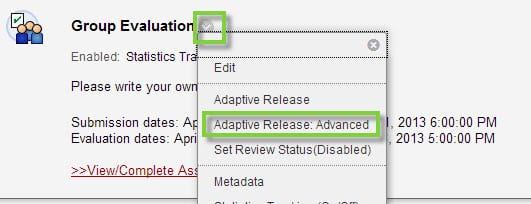
Once you have enough copies of the Self and Peer Assessment for each group, you can change the settings for each copy. Click the Action link on the Assessment title –> Adaptive Release (Advanced).
Click Create Rule
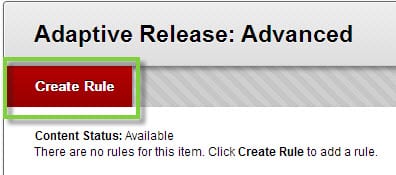
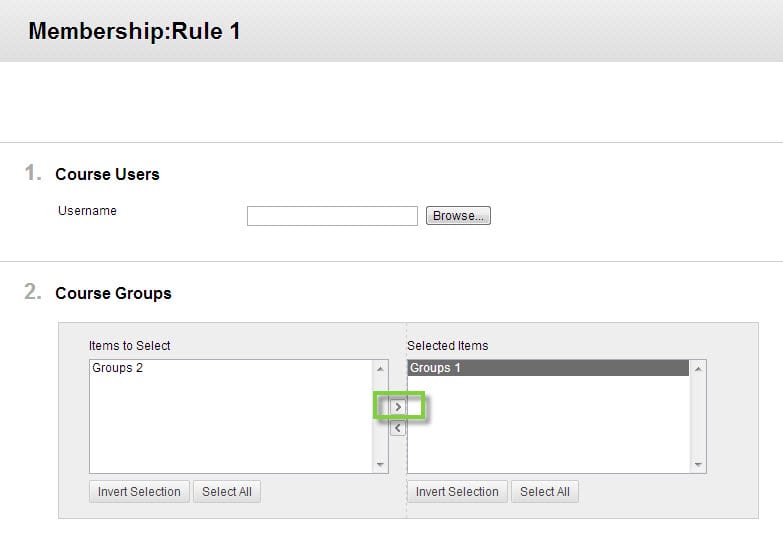
The Rule name will default to Rule 1 – you can leave that and click Submit. On the next screen, click Create Criteria –> Membership.

Move one Group (remember in Step 1 when you create Groups?) from the left column to the right.
Repeat this for all copies of the Assessment – each Group will need their own copy. This ensures that students are only evaluating their own group members.
Step 6: Let your students know that you are ready to go!
During the Submission Date Range, each student will need to go in and submit their name.


During the Evaluation Date Range, the students can go in to the same course item and evaluate their group members.

As always, please don’t hesitate to contact us if you have any questions. We’d also love to hear how it goes if you give this method a try!