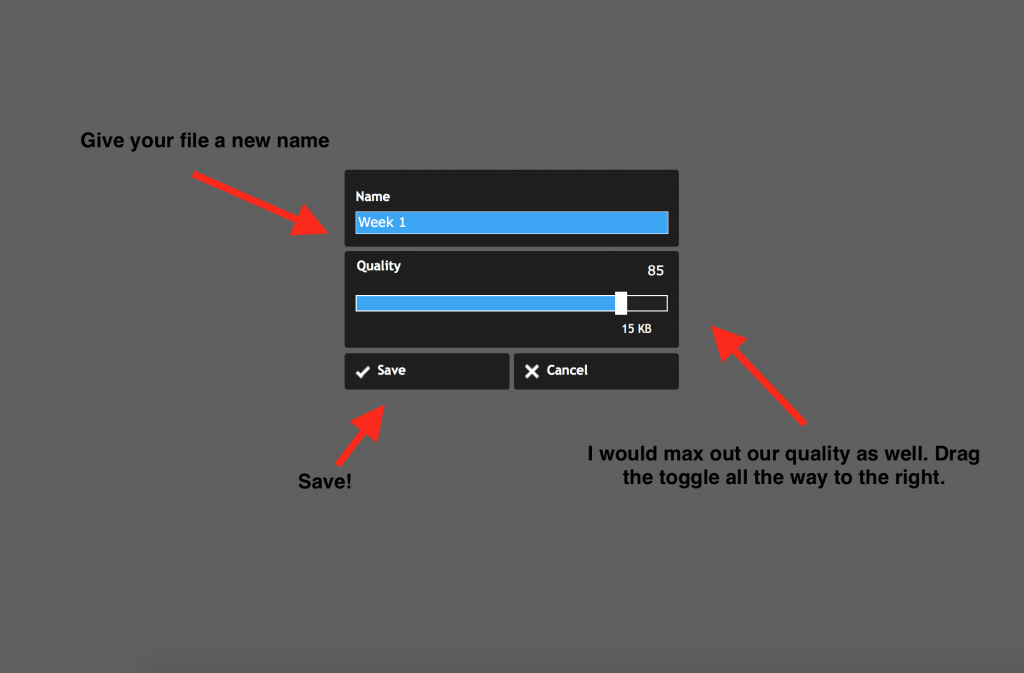
Ok! We have gotten a lot of requests on how one can create buttons for their canvas courses themselves. I LOVE that everyone wants to be self sufficient! So here it is – how to create buttons!
Before We Start:
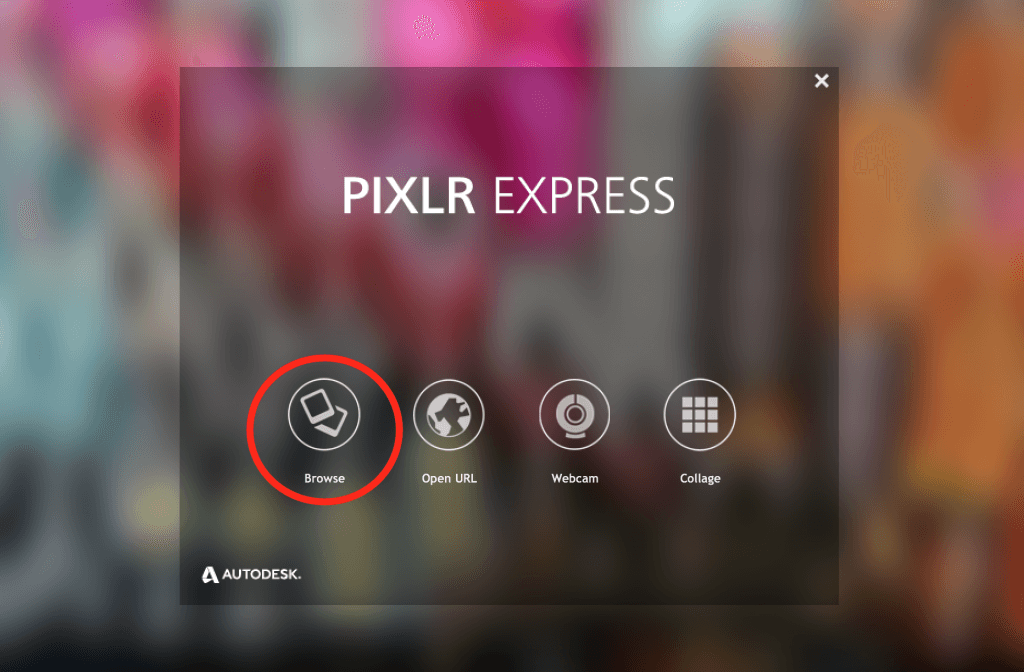
- First – you’ll need to create a free account with PIXLR – https://pixlr.com – and you’ll be using their web app called PIXLR Express
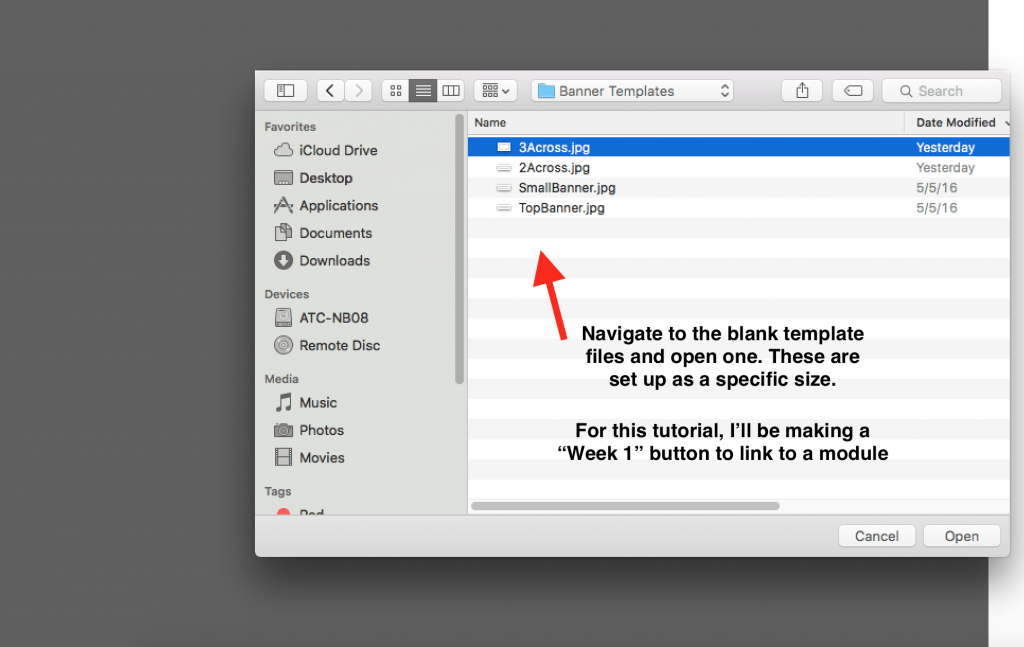
- Second – you’ll need to download some templates that I’ve created. Click Here to download them. The file names have to do with what kind of banner they are.
- Third – you will need to have images already collected to create your buttons. Click here to learn about how to find images.
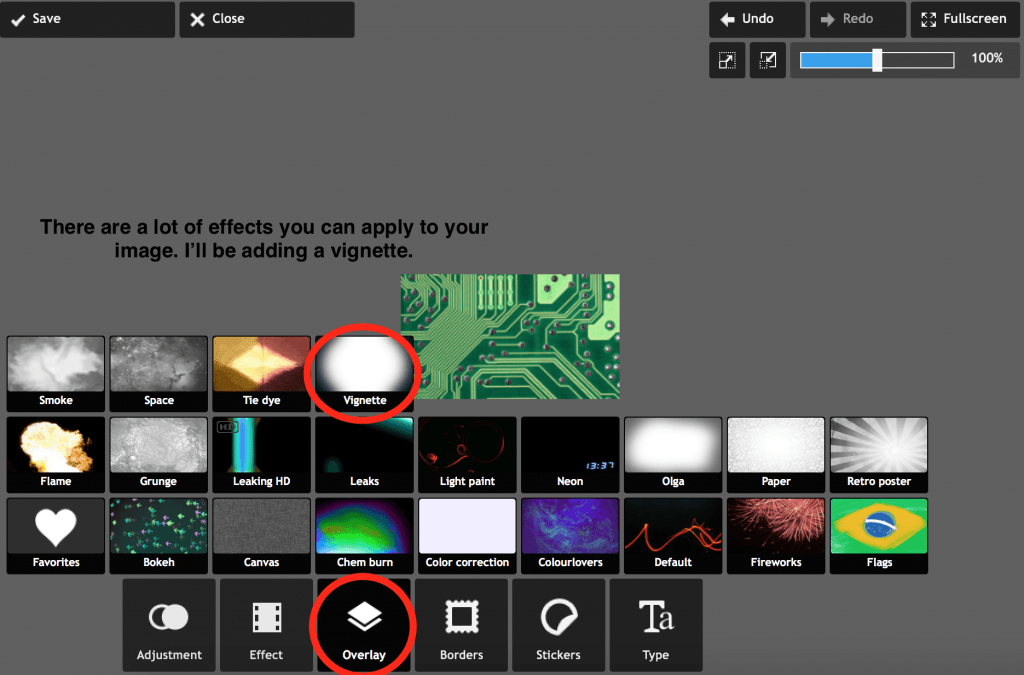
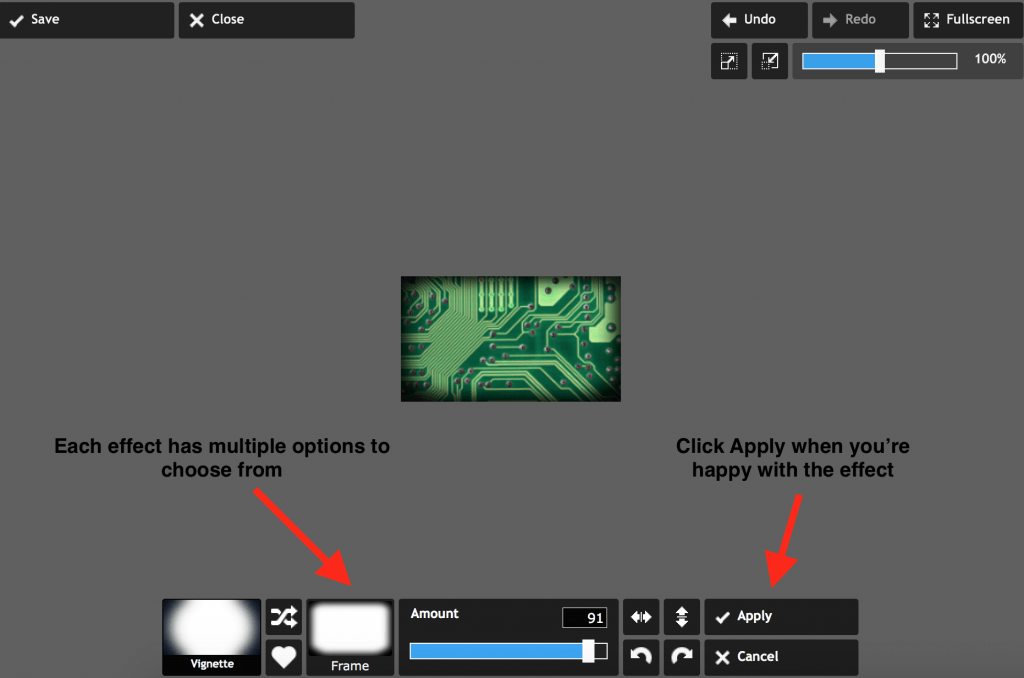
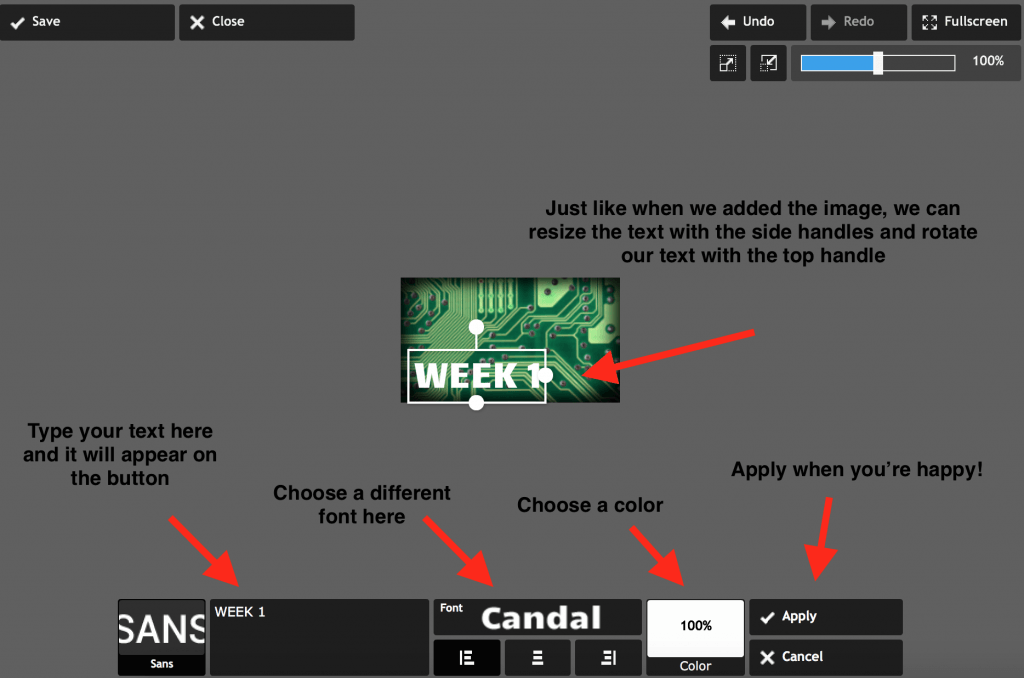
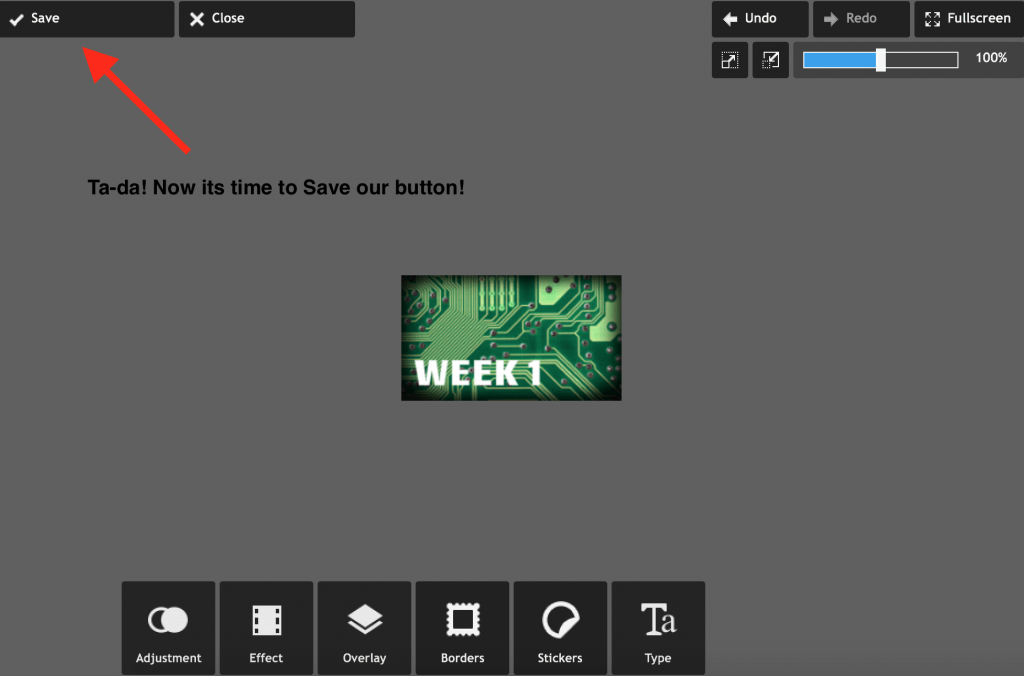
Let’s get started!
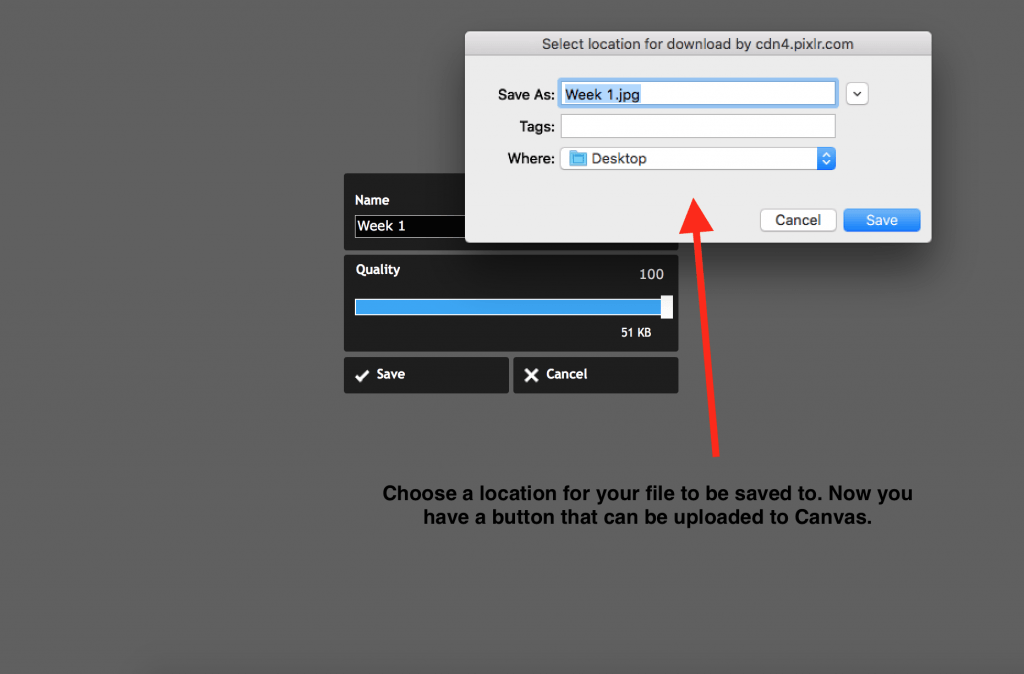
Ok! Now we have a button! Now go make some more! 🙂
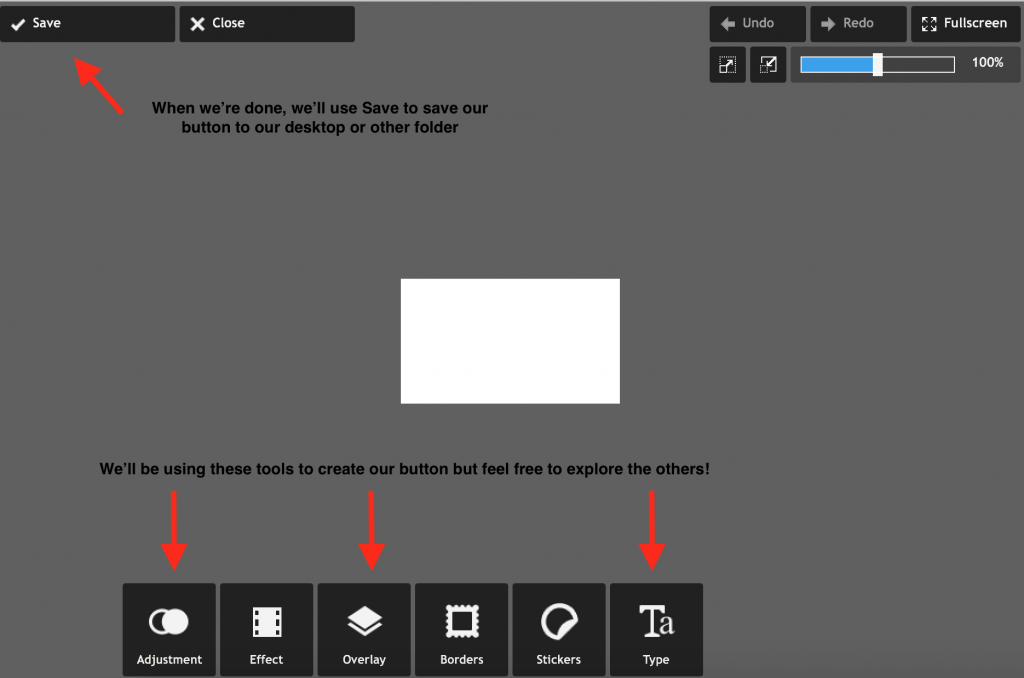
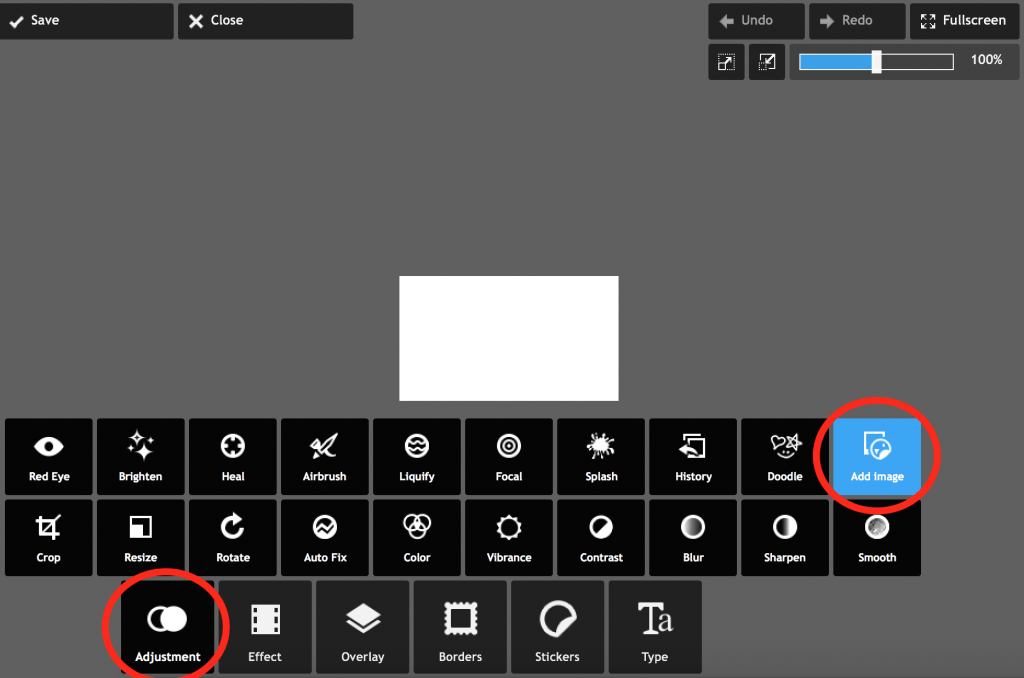
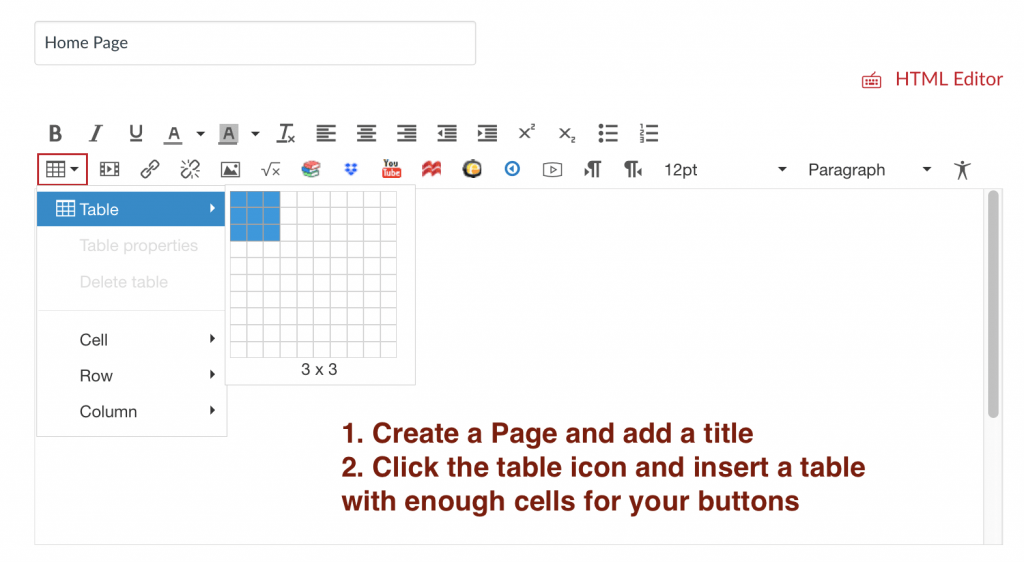
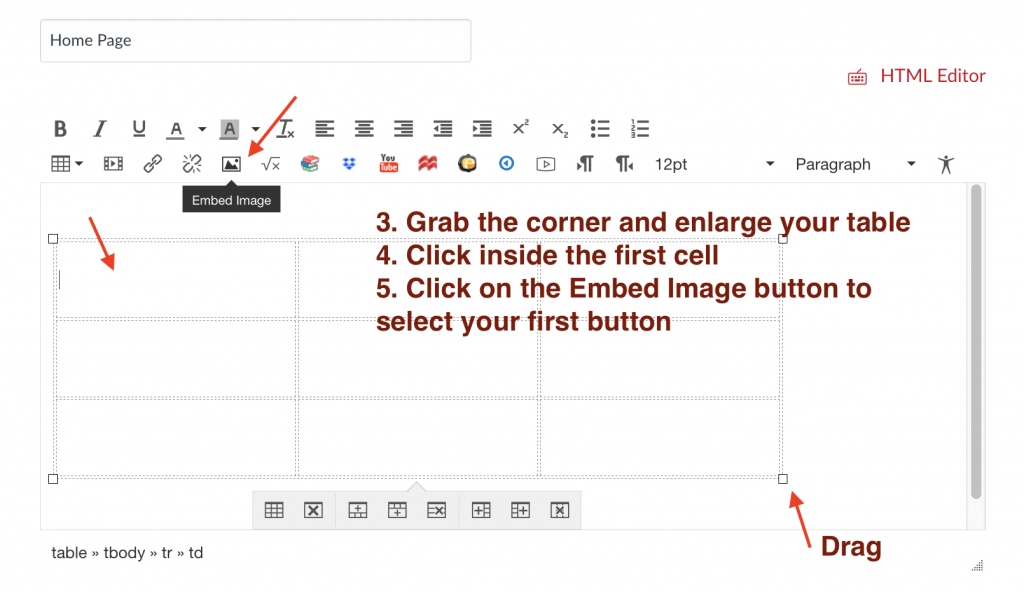
When you’re in Canvas, you’ll be uploading these buttons in the “File” section first. Then you can add them to your Home Page. To have buttons line up nicely – I insert a table into the page, then add a button to each cell. The templates are set up for how many cells across the table is. Most commonly used is 3 buttons across and then however many down you need. Follow the steps below:
Feel free to reach out with any questions! atc-ttl@wpi.edu




One thought on “How to create Canvas buttons using PIXLR”