Greetings, WPI faculty and students!
Many of us don’t want to use a classroom to record our lectures. Instead, we want to record from the privacy of our own homes or offices.
In this post, we’ll dive into the software that will enable you to do just that: Echo360 Universal Capture – personal.
This post will cover the following topics:
Access Universal Capture
Install Universal Capture
Edit Capture Details
-
Access Echo360
The first step is to access the software. To do that, go to your course website in Canvas. If you don’t have a course site, login to Echo360 here.
You’ll notice the Echo360 button on the left-side menu of your Canvas course site. Click it. This brings you to the Echo360 section of your Canvas site. From here, you can see the Create button on the top ribbon, as shown in the image below.

-
Install Echo360
Clicking on the Create button releases a drop down menu. Select New Capture.
Now, if you don’t already have Echo360 Universal Capture installed, you can choose to download the installer for the platform you’re on. Once it’s downloaded, you’re onto the next step.

If you do already have the application installed, the system will request permission to open it.

Now, once Echo360 Universal Capture is open, you’ll see your name on the top right. (If you don’t, you’ll see “Log in” and you can follow the prompts to do so.)

-
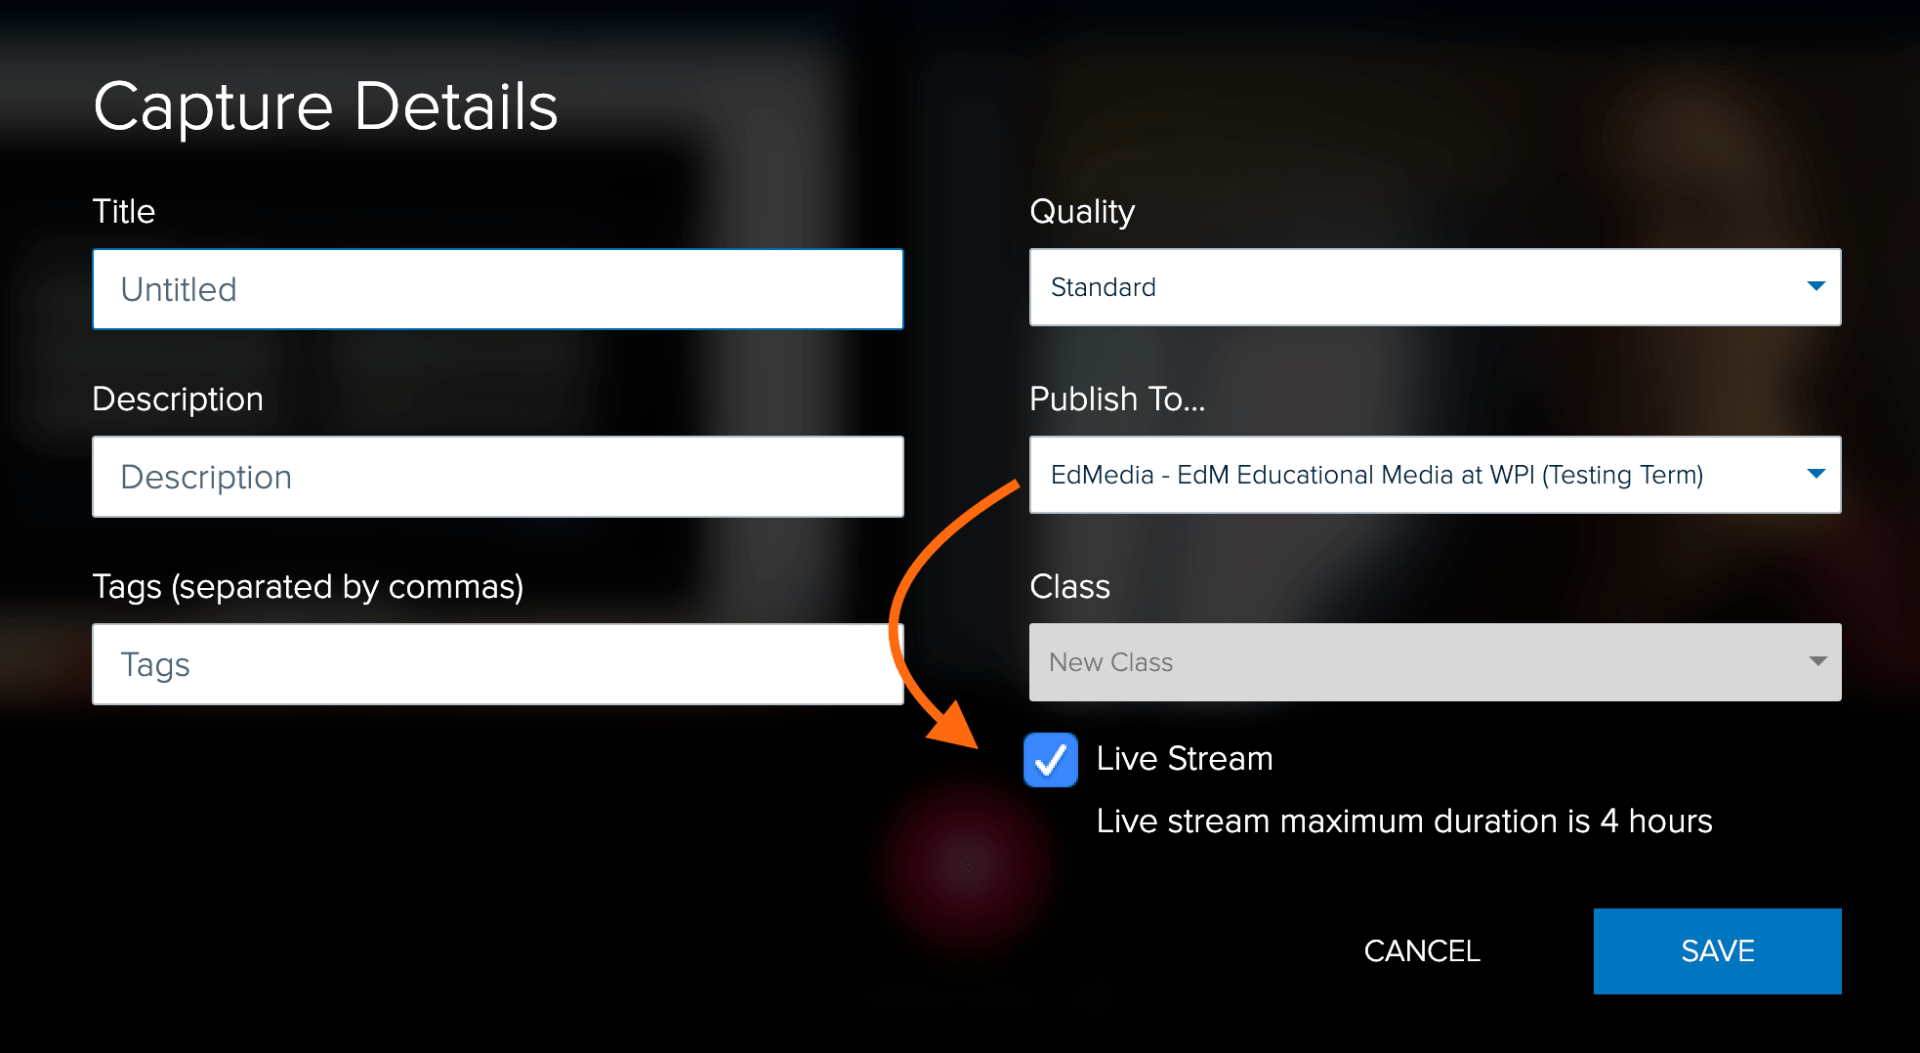
Edit Capture Details
Before you start recording, you’ll need to fill in some capture details. On the top left of the interface, you’ll see Edit capture details.

Editing capture details is the third step you take before you click the record button.
In Capture Details, you’ll name your video. You’ll also decide where you want your video to go once you’re done recording it.
In the “Publish To” field, you can select to publish – aka share – it directly to your course site or to your personal library on the Echo360 cloud.
If you choose to publish your recording to a course, it will populate into the Echo360 section of your Canvas site. If you select “Library” the capture won’t be available for your students until you manually share it to the course site. Note also the select box for Live Stream – it won’t be available if you select “Library”. You have to chose a course to publish the video to in order to make the Live Stream selection box available.
If you choose to stream your capture live, students can access it from the Echo360 section of your Canvas website.
Now that you’ve set up the meta-data and the upload location of your file, it’s time to start recording. The recording interface looks like the below.

You’ll need an audio source – either an internal microphone or an external microphone. The display windows show whatever computer monitors or webcams are detected by the software. Most people choose to show their computer display on the left and their webcam image – if any – on the right.
Once you press record, the interface will minimize and you’ll be able to maximize your Powerpoint or whatever it is that you want to record.
Many people choose to record both a camera video of themselves, especially for introduction videos, and their screen. Some choose to record just the computer screen while they narrate/annotate. There are lots of creative options for you!
If you have any questions about Echo360 Universal Capture, please email atc-ttl@wpi.edu