The Echo360 – Zoom Connection
Good news for Echo360 users: your Zoom cloud recordings can be ingested by Echo360 and placed in your personal libraries and course sites. Why is this good?
For starters, it allows you to keep all your video content in one place.
You don’t have to deal with multiple video storage platforms. And you don’t have to take that step – if your current practice is to record the Zoom meeting to your own computer – of manually uploading the video file to Echo360. Echo360 now just gobbles them up – as long as you’ve recorded to the cloud, that is.
What is the Zoom cloud? It’s a place to store your recordings that’s on the internet. Why can’t my videos just live there, on that cloud, forever? Because they’re only stored for 100 days. That’s why making arrangements for your Zoom videos to move to a more permanent location, like Echo360, is important.
Here are the steps for enabling Echo360 to store the meetings you record to the Zoom cloud.
Step 1: Enable Zoom Recordings on Echo360
From your Canvas site, click the Echo360 button on the left. From the Echo360 user interface in Canvas, click the gear wheel on the right. From the dropdown menu, click Account Settings.

From here, you’ll see Zoom Settings on the left. Once you click on Zoom Settings, you’ll see the toggle switch to “Automatically copy Zoom recordings to Echo360”.
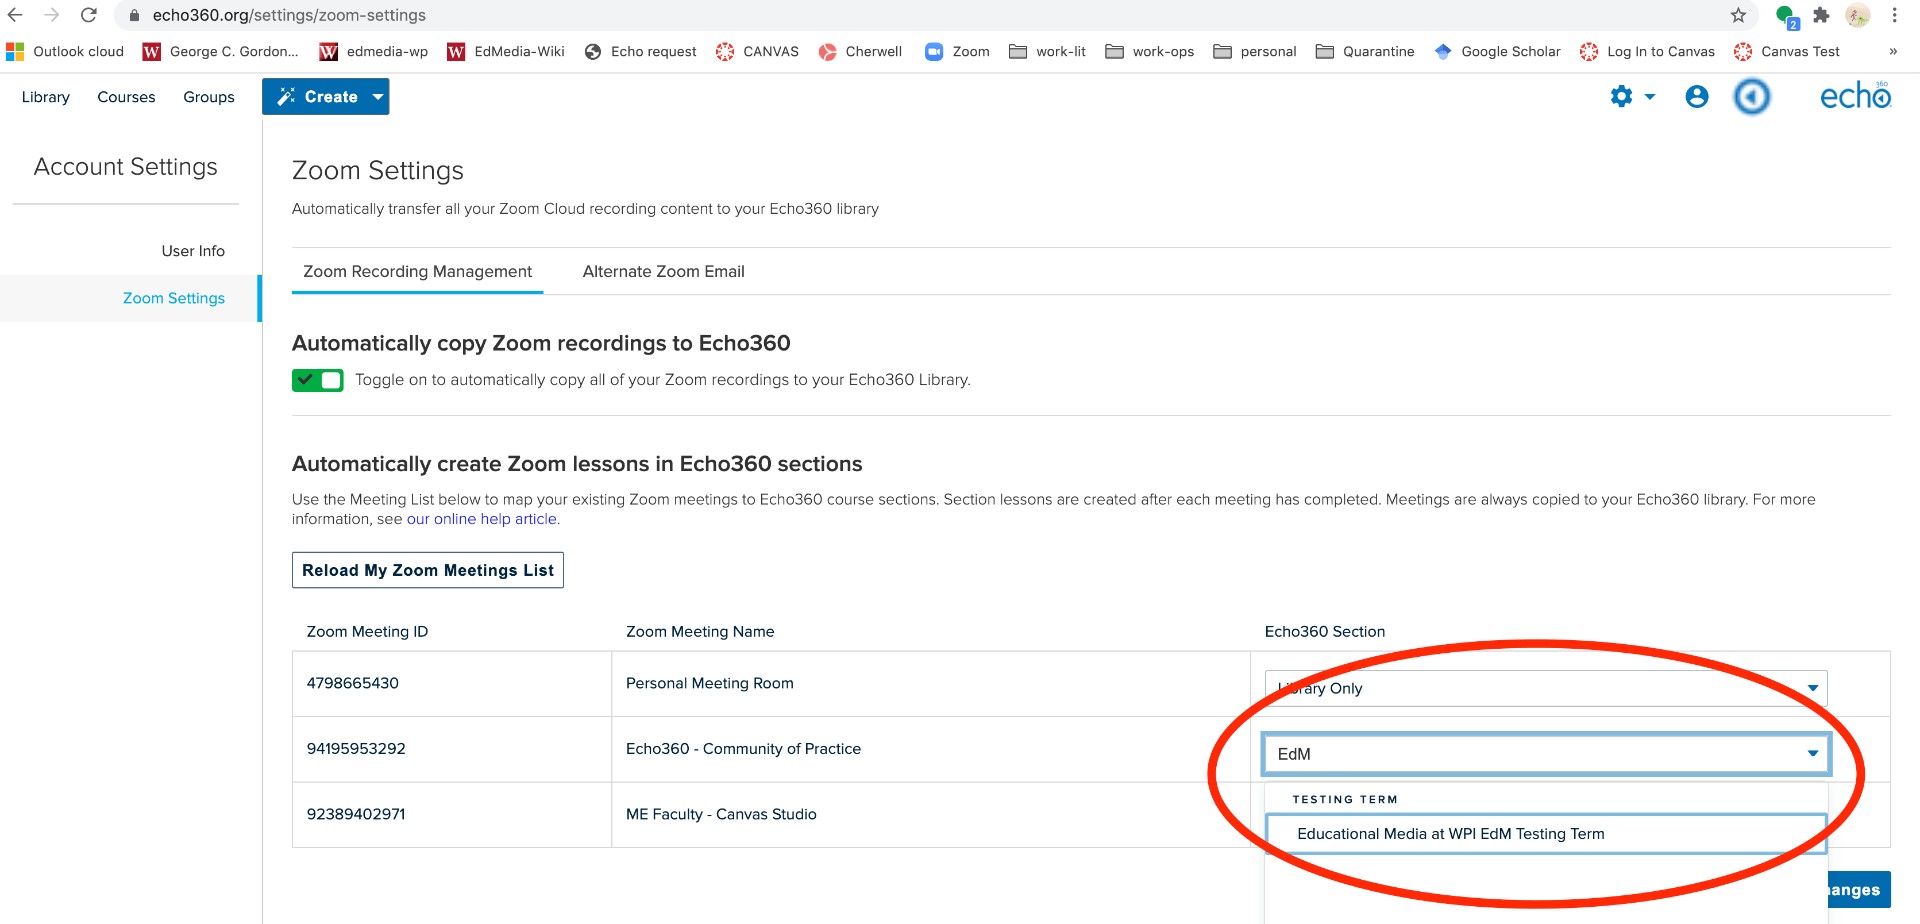
Once this switch is on, Echo360 basically takes a look into your Zoom account. All recordings – once you’ve chosen to record to the cloud – are copied to your Echo360 personal library. The Echo360-Zoom mapping tool, shown below, sees your upcoming meetings – singular and recurring. Using this mapping tool, you can assign recordings from a recurring Zoom meeting to a particular course section in Echo360. It’s this assignment which enables your Zoom recordings to appear in the Echo360 section of your Canvas course site.
Below, you can see my Zoom settings. On the right side of the image you can see options of where meeting recordings can go.
You can see that I’ve decided to route my “Echo360 – Community of Practice” Zoom meetings to my EdM section for the testing term. For you, it might be that you want your upcoming FP520 Zoom meetings routed to your FP520 Echo360 section for the Spring 2021 term, for example.
Step. 2 Record Your Zoom Meeting
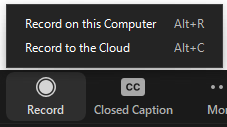
When you set up a recurring meeting, you can elect to have it automatically record to the cloud. But if not, record your meeting in Zoom, and select the Cloud option. If you’re sharing your camera, the recording option is usually at the bottom.
When you end the meeting, the video will upload to the Zoom cloud. Once Echo360 “hears” that it’s there, it’s going to make a copy of it and bring it over to live in the Echo360 cloud. There it will reside in your Echo360 library AND your specific course section (if you’ve enabled that).
For a video version of directions on using the Echo360/Zoom integration, click here. For more information on sharing a video with your students via Echo360, please click here.
Any questions about the Echo360-Zoom integration? Let us know by emailing atc-ttl@wpi.edu.


