Over the next couple of months Qualtrics will be updating the dashboard where you build your surveys. Here is a preview of what to expect (from the Qualtrics Support Website).
About the New Survey Builder
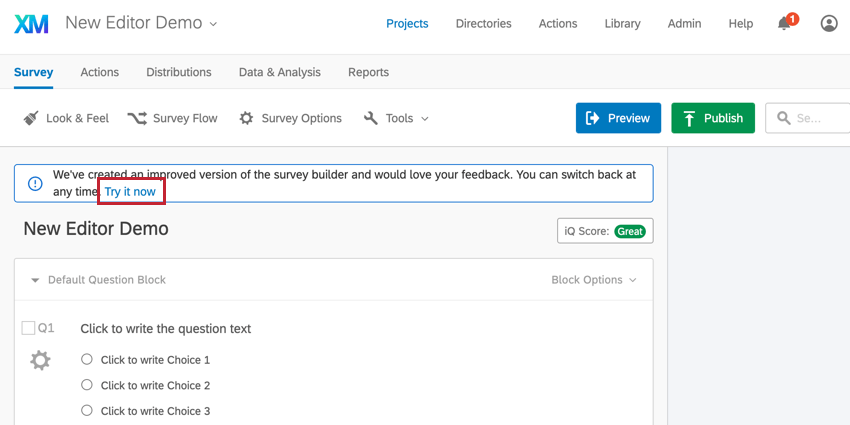
Qualtrics is releasing a new experience for editing your Qualtrics surveys. This new experience provides improvements for building surveys and allows you to more easily customize your survey to your needs.
To access the new survey builder, click Try it now in the banner that appears at the top of the Survey tab. Once this is turned on, it is turned on for all surveys in your account.
Below is an introductory video for the new survey builder.
Toolbar Navigation
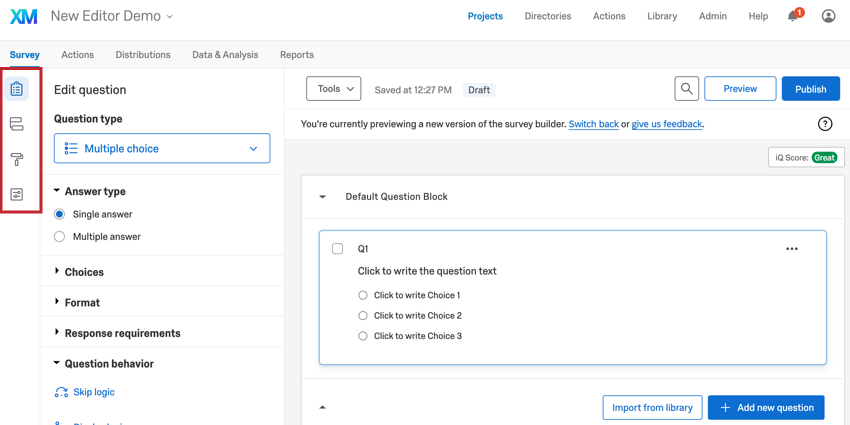
On the left-hand side of the survey builder is a toolbar for managing the different aspects of your survey, such as survey options, survey design, and survey logic.
Survey
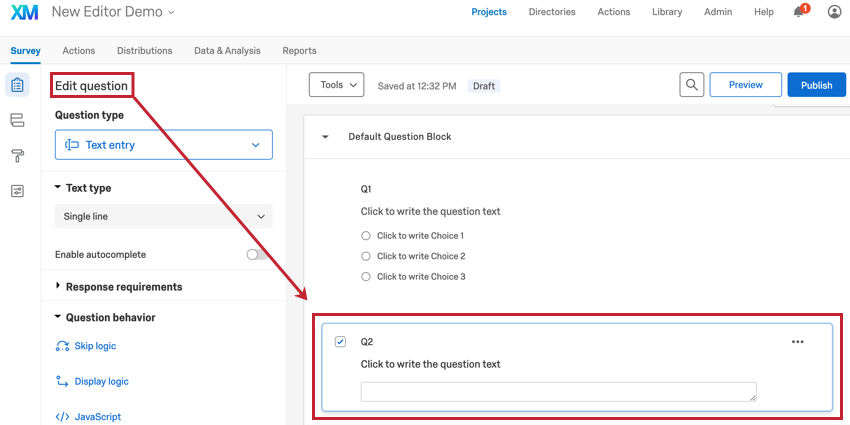
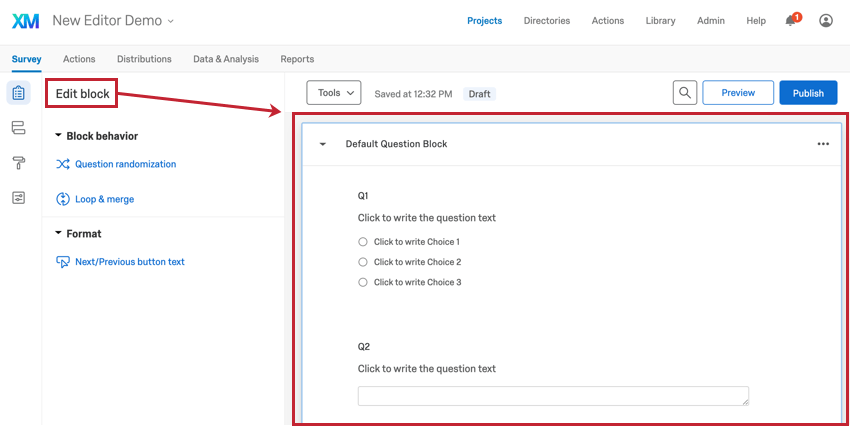
The Survey section is where you create and edit your questions and blocks.
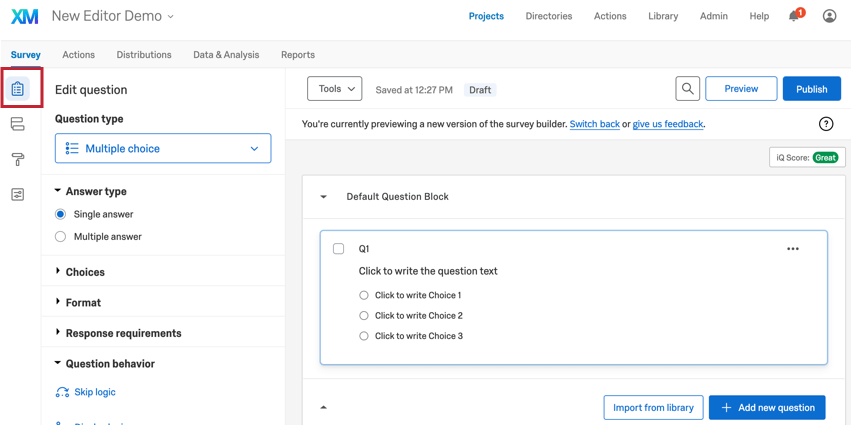
In the survey builder, the question or block that you are editing will be outlined in blue. You can then use the Survey section to edit your selected question or block, such as changing answer choices, adding validation, adding display and skip logic, and more! See Creating Questions for more information.
At the top of the Survey section is a menu for managing the advanced aspects of your survey, as well as testing your survey and pushing changes to the live version of your survey. In this menu, you can do the following:
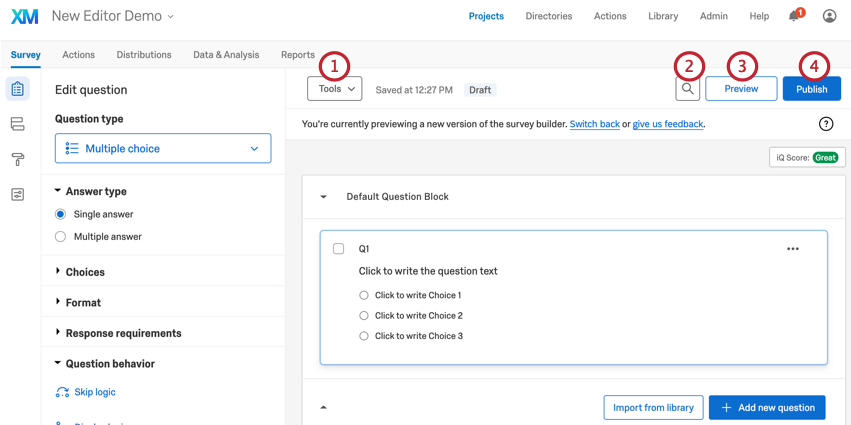
- Tools: Access the Survey Tools for managing aspects of your survey, including auto-numbering questions, resetting recode values, managing reusable choices, generating test responses, reviewing your survey for methodology and other mistakes, collaborating your survey, managing survey versions, and importing & exporting survey files. See Survey Tools for more information about each option in this dropdown.
Qtip: The options for quotas, scoring, and survey translations are found in Survey Options.
- Search: Use the search to quickly find a specific question or block in your survey. This is particularly useful if your survey contains many questions. Click the button to make the search bar appear.
- Preview: The Preview button is used to test your survey before sending it to respondents. See Preview Survey for more information.
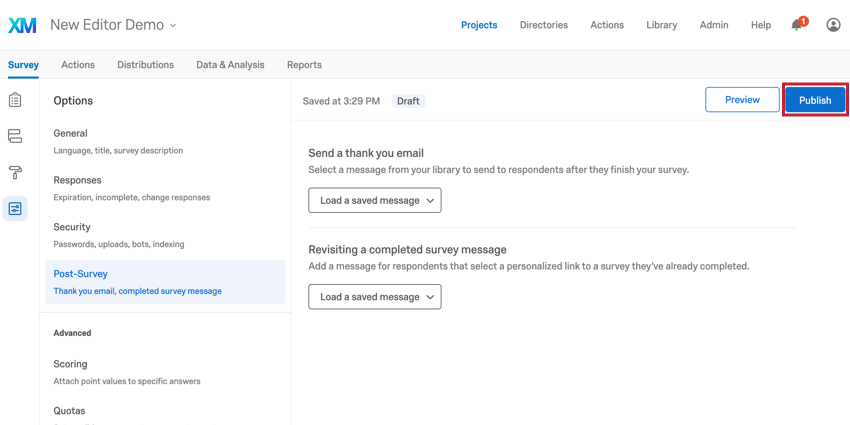
- Publish: The Publish button is used to push your survey edits to the live version of your survey. This is particularly useful if editing a live survey, as it allows you to make changes and then push the changes live all at once. See Survey Publishing & Versions for more information.
Qtip: This button will only appear after you’ve made edits that haven’t been published. If you don’t see this button, you have no changes to publish.
Survey Flow
The Survey Flow section is a block-level view of your survey and details the order in which blocks are displayed to your respondents. From here you can customize where respondents go in your survey, what they see, and what they don’t see. You can think of the survey flow as your survey’s roadmap, dictating the path respondents take in your survey.
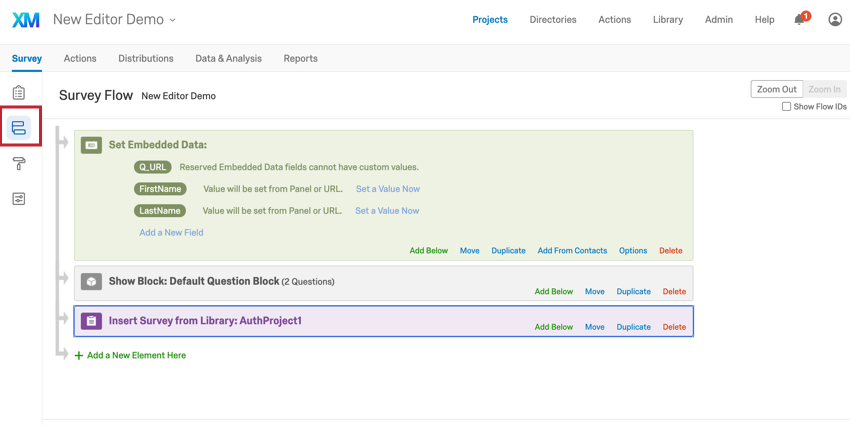
You can perform simple tasks like rearranging question blocks, or you can add elements like branch logic that directs and personalizes your respondents’ survey experience. See Survey Flow for information about every element you can add to your survey flow.
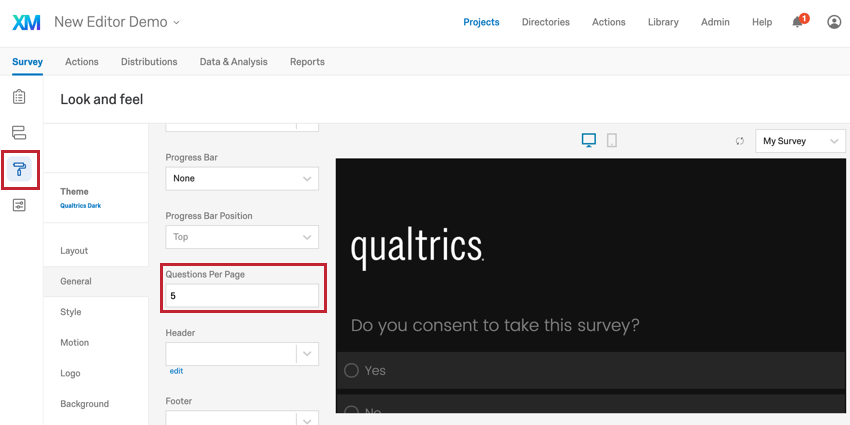
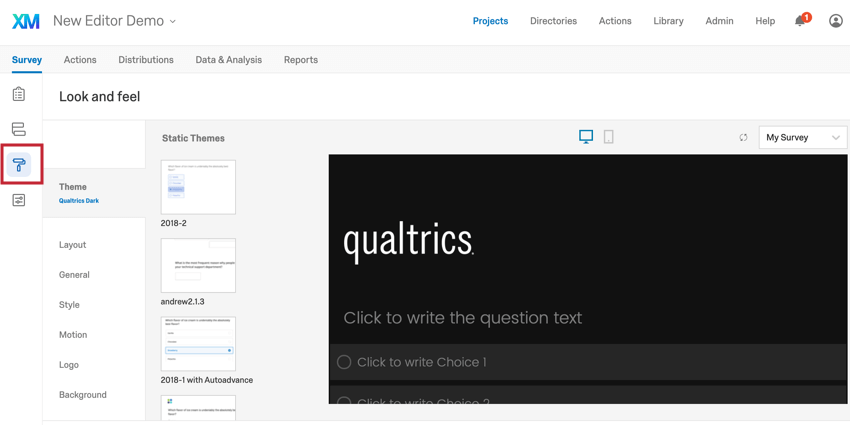
Look & Feel
The Look & Feel section is where you determine the aesthetics of your survey. In this section, you can select a survey theme, fonts, add a header and footer, and so much more! See Look & Feel for an overview of every customization option available here.
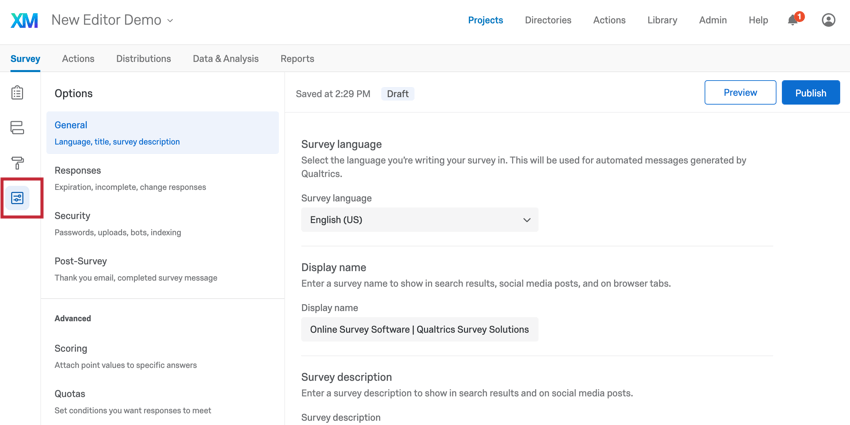
Survey Options
The Survey Options section contains settings that affect your respondent’s experience when taking the survey. This section also controls other factors of your survey, like when the survey expires, translations of your survey, and survey security.
This section is broken into the following subsections:
- General: General survey settings including the survey name, description, language, and if question numbers are displayed to respondents.
- Responses: Controls how the survey collects responses. Settings include adding a back button, allowing respondents to save their progress and continue later, determining when the survey expires, and controlling how the survey processes partial responses.
- Security: Controls who can access your survey and additional security measures. This includes making your survey invite-only, turning on bot detection, adding a password, and more.
- Post-Survey: Determines what happens when respondents finish the survey. You can set up a thank you email to send to respondents, and choose a message that displays to respondents if they try to retake a survey they’ve already completed.
- Scoring: Add point values to your answer choices to calculate a score for the respondent.
- Quotas: Add quotas to your survey to determine keep track of responses that meet certain criteria, ensuring you only collect the data you need.
- Translate Survey: Add translations to your survey..
- Adobe Analytics: Pass data between Qualtrics and Adobe Analytics if you have access to the Adobe Analytics extension.
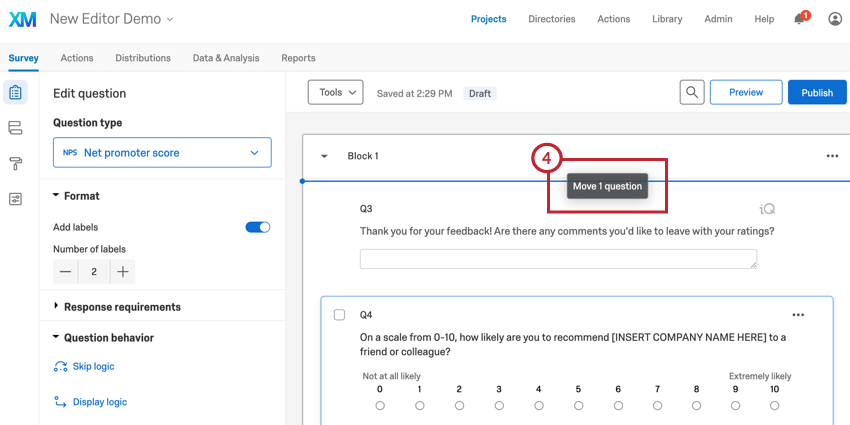
Moving Questions and Blocks
The survey builder uses drag & drop functionality to move questions and blocks in your survey. To move a question or block:
- Click on the question or block you’d like to move, which will be outlined in blue.
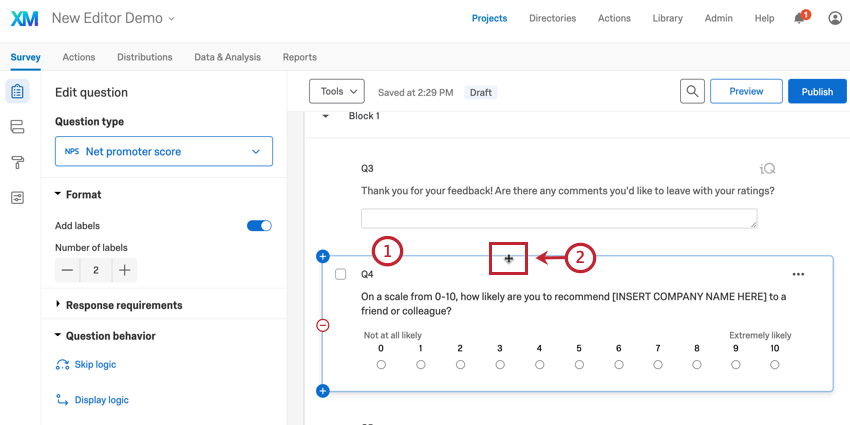 Qtip: You can select multiple questions by holding the Shift key on your keyboard when clicking on your questions.
 - Hover your mouse around the border of the question or block until it makes a four-way arrow.
- Click the left mouse button.
- Drag your mouse to where you want to move the question or block in your survey. A blue line will appear showing where the question is being moved to.
- Release the left mouse button.
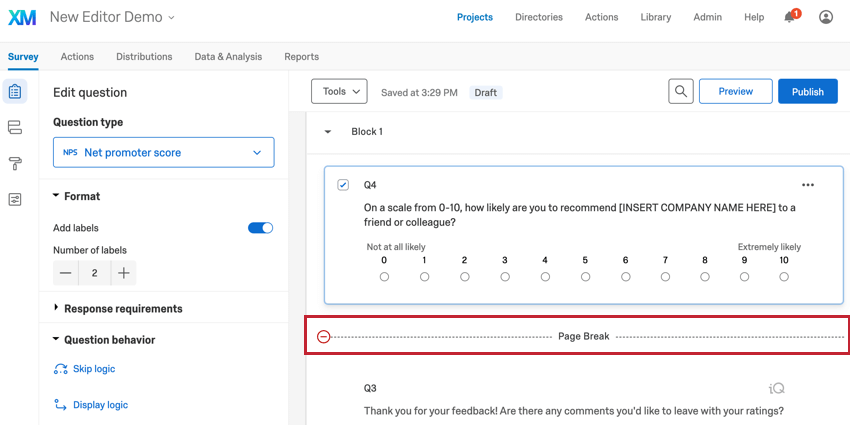
Adding Page Breaks
By default, all questions in a question block will appear on the same page. To reduce survey fatigue and improve your respondents’ experience, add page breaks periodically to split your survey into multiple pages. Page breaks are automatically added between question blocks.
To add a page break between questions in the same block:
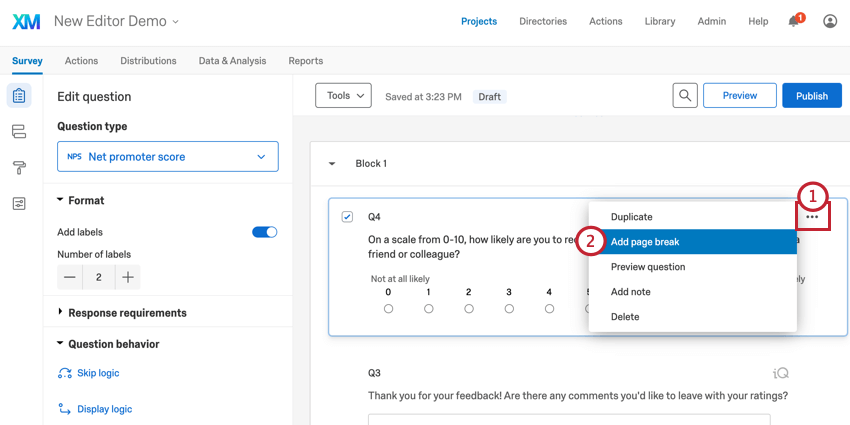
- Click the three dots in the top right hand corner of the question you want to add a page break after.
- Select Add page break.
Once you’ve added a page break, a horizontal line will appear in the builder where the page break will be. To remove a page break, click the red minus (–) sign next to the page break.