Updated 1/9/2024
Did you know you can set up your Zoom cloud recordings to automatically transfer to your Echo360 Library? Since Zoom cloud recordings are deleted after 100 days, Echo360 is the preferred storage solution.
To set up your course to record with Zoom and be stored in Echo360, follow these steps.
- Go to https://wpi.zoom.us and go to Meetings.
- Click the Schedule a Meeting button on the right.
- Fill out any specific details of your meeting. You can set this meeting up as being recurring for each of your class sessions. For naming conventions, a best practice is to name the meeting after your course and/or any identifiable dates, topics, or course section information.

Scheduling a meeting in Zoom - Click the checkbox for “Automatically record meeting”
- Click the radio button for “In the cloud”
- Click Save

The Zoom part is complete. Now, we can set up the Echo360 portion so that it knows to copy the Zoom recordings over to Echo.
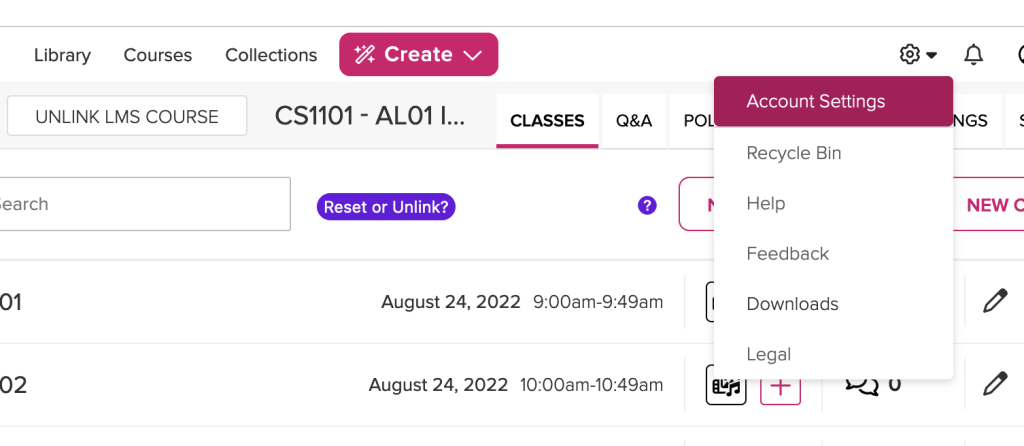
- Go to the Echo360 section of one of your Canvas courses.
- Click the gear wheel on the top right.
- Choose Account Settings from the drop down menu.
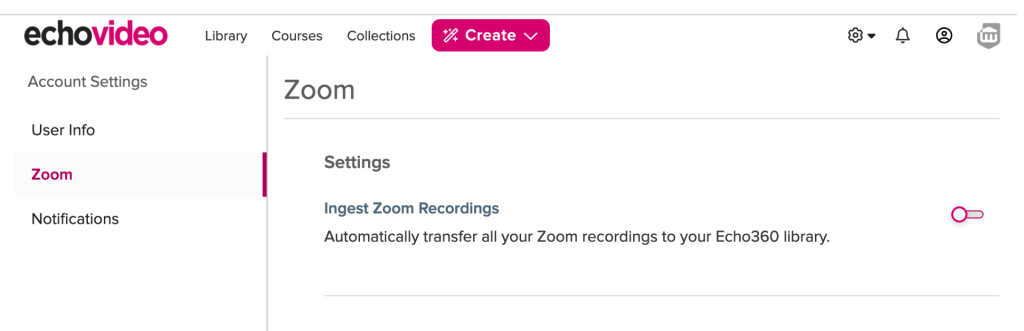
- Click on Zoom in the left hand menu.
- Toggle the switch to the “on” position for Ingest Zoom Recordings.
For more information on mapping your Zoom cloud recordings to Echo360, click here.
If you have any questions about setting up Zoom so that it feeds into Echo360, please let us know by emailing us at atc-ttl@wpi.edu.