This post will walk you through how to embed your Studio videos into a Canvas page.
The first step is to create a new page in Canvas.

Once you’ve done that, you’ll notice a rich content editor with a bar of buttons.
This row has buttons pertaining to formatting and items that you can include in the pages.

See the button with three vertical dots to the right? This will reveal additional items you can include in the page.

If your browser window is wide enough, you may not have this dot button and instead all the choices therein will be displayed in the same row.

The goal here is to get to the plug. Once we click the plug, Canvas is basically saying, “Ok, which app do you want to plug in to the page?”

Since your videos are in Studio, click on that. Next, find the video you want to insert into the page.

To embed media shared by another user, click the My Uploads menu and then click the Shared with Me link.
Note: Selecting shared media from the course it was shared from will not provide the embed option. To embed shared media, open the Shared with Me collection or search for the media by name.
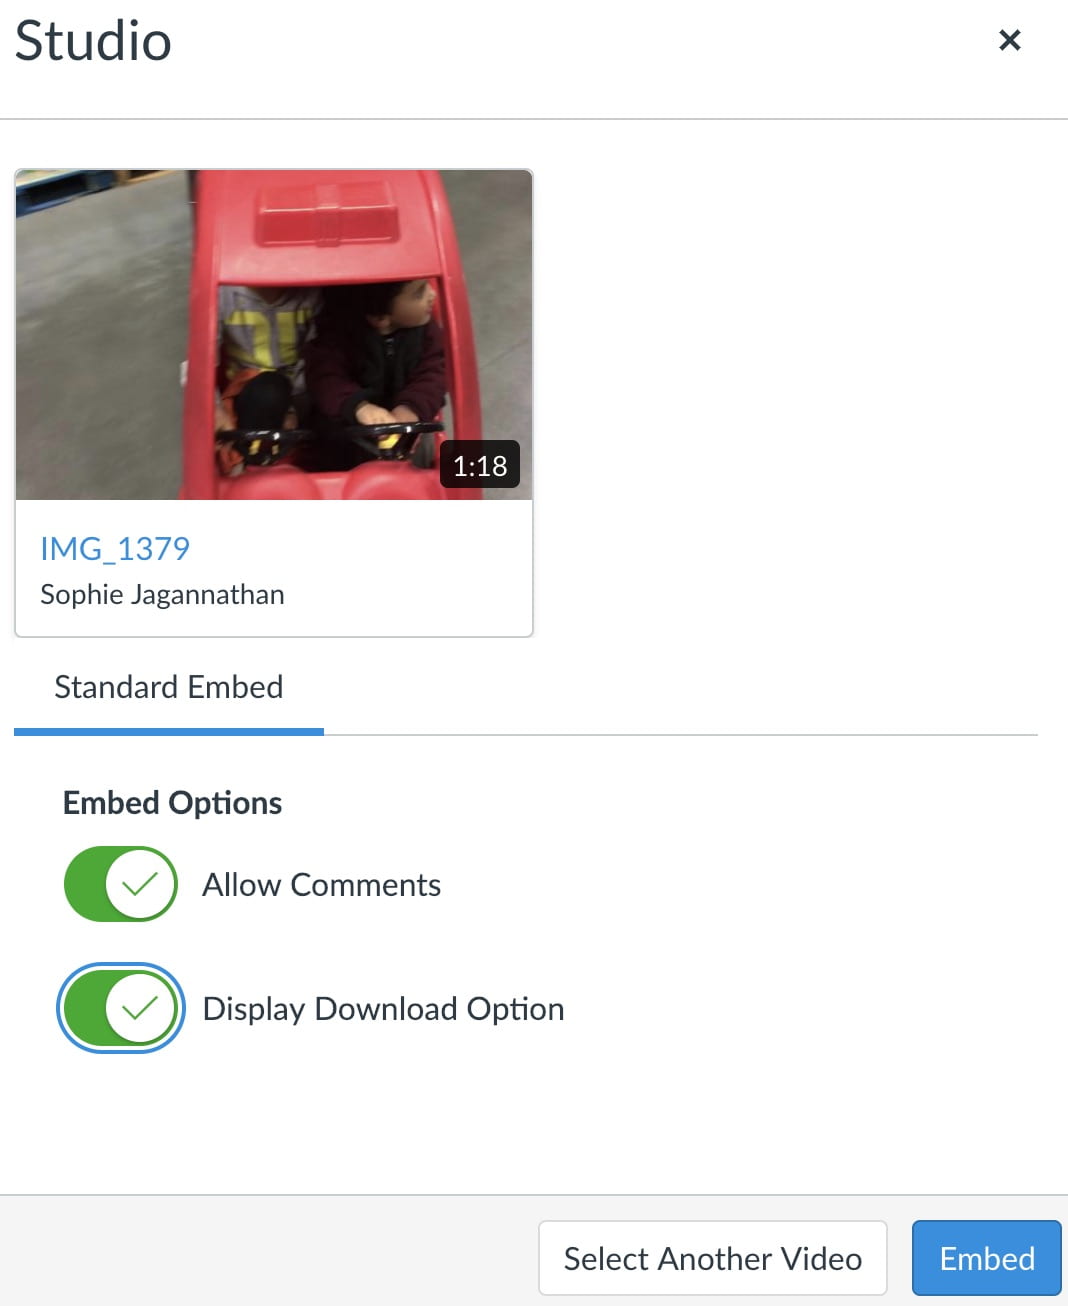
By default, comments are included in the embedded media file.
To disable comments in the embedded media file, click the Allow Comments toggle button. You can also choose whether to allow downloads of this video.
Click embed.

If you have any questions about embedding Studio videos in a Canvas page, please email us at atc-ttl@wpi.edu.