The Americans with Disabilities Act prohibits discrimination in the places of public accommodation – such as schools – and failing to transcribe or provide closed captions for your educational videos can be seen as a violation of the ADA. So transcripts and captions have legal significance. But beyond that, they help your students access your educational videos. And isn’t that what we all want?
To that end, this post describes the transcription and closed caption functions in Echo360.
First, to define terms. A transcript is the textual representation of what is said during a video. An interactive transcript presents as a block of text that scrolls along with the speech in your video.
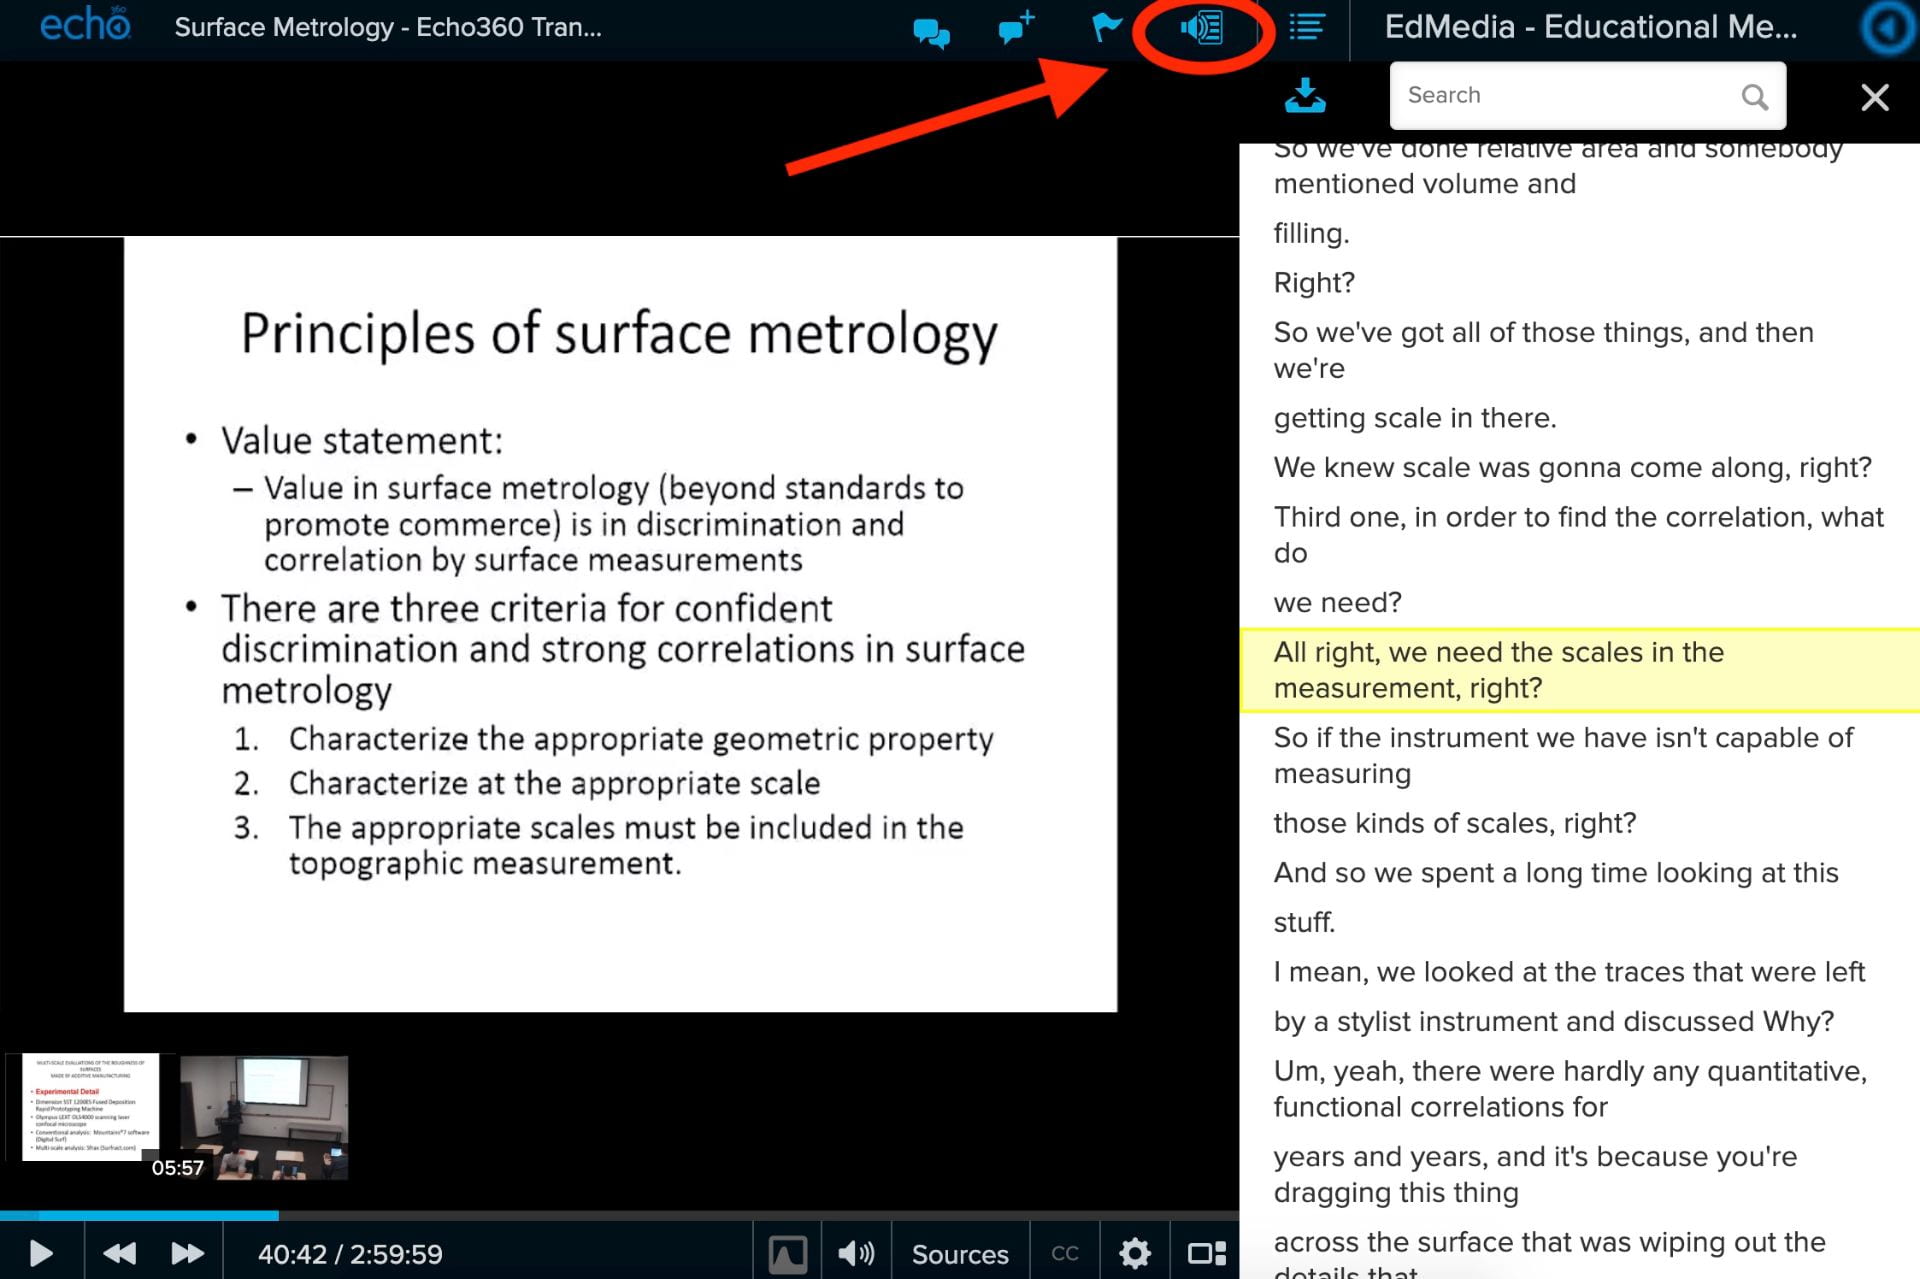
In Echo360, the transcript is on the right, as shown in the image above.
Closed captions are smaller segments of the transcript that are overlaid on top of the video in synchronization with the spoken word. Closed captions can be turned off and on by the viewer.
Using the Transcription Function in Echo360
Echo360 generates a transcript for all videos that are uploaded to the system, whether the video was created in a WPI classroom, using Universal Capture or from a Zoom meeting. The process of generating the transcript takes about twice as long as the duration of the video. For example, if your video is one hour long, it will take two hours before you’ll be able to see a transcript.
When the transcript is ready you can view it by clicking on the megaphone/page icon as shown in the image below.
Once the transcript is available, you can follow along with the spoken word by reading the highlighted text. You can also download the transcript.
Instructors can also edit the transcript for accuracy. To find out how to access the transcription editor, click here.
Creating Closed Captions in Echo360
Students with accommodations through the Office of Accessibility Services at WPI may request captioning for your course. If that is the case for you, the Office of Accessibility Services will work with you to coordinate professional captioning services.
However, if there is no formal accommodation and you wish to create closed captions yourself, you can do so.
Using the Edit Transcript function, you can apply your transcript to closed captions.
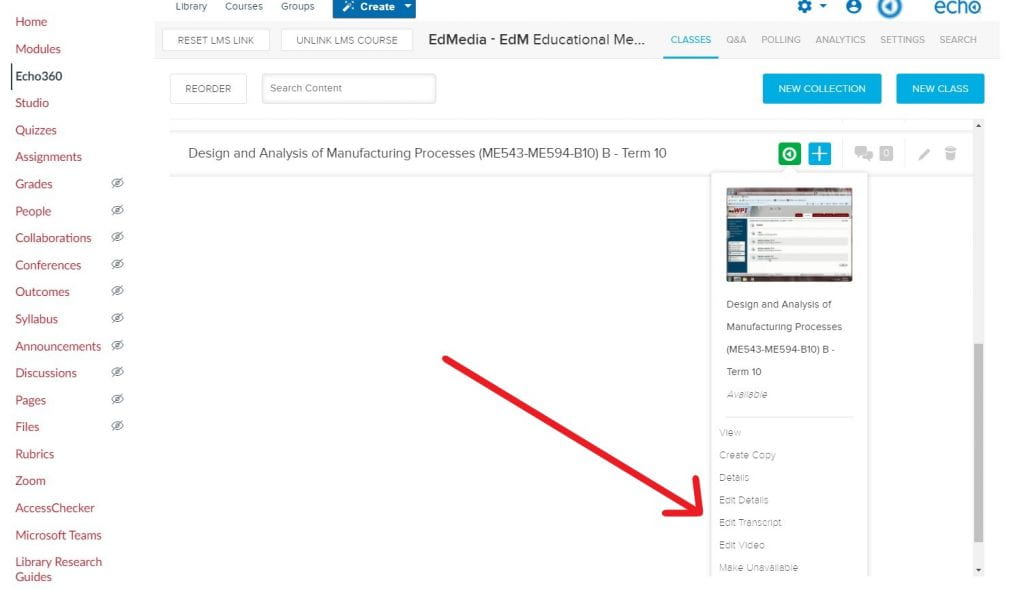
One way to find the Edit Transcript function is to go to the Echo360 section of your Canvas site and click on the green button to the right of the video’s name. Choose Edit Transcript. (You can also access the Edit Transcript function from your Echo360 library.)
In the edit transcript interface, you can edit the transcript, save versions and also “Apply to CC”. If you click the apply to CC button, the transcript text is applied to the video as closed captions, using time data from the transcript.
Now, when your students view your video, they have the option to click the CC button and view the captions.
I’d be remiss if I didn’t encourage you to take a look at your transcript before releasing the video to your students. The transcript is created through a machine learning tool and has varying accuracy. It’s worth it to make sure that what you meant to say is what is written. For more information on editing your transcript, click here.
If you have any questions about using transcripts or captions in Echo360, feel free to email us at atc-ttl@wpi.edu.


