Instead of sharing your whole oeurve with an audience, you might just want to share certain videos that pertain to a topic.
Good news – this kind of selective sharing is now possible in Canvas Studio!
This blog post will walk you through how to create a collection of videos in Canvas Studio and share it with students or collaborators. To do this, I’ll show you what I did to create a collection for my course, “Educational Media at WPI”.
The first step is to click on Studio on the left side menu. You can see Studio is selected because it’s in black font.
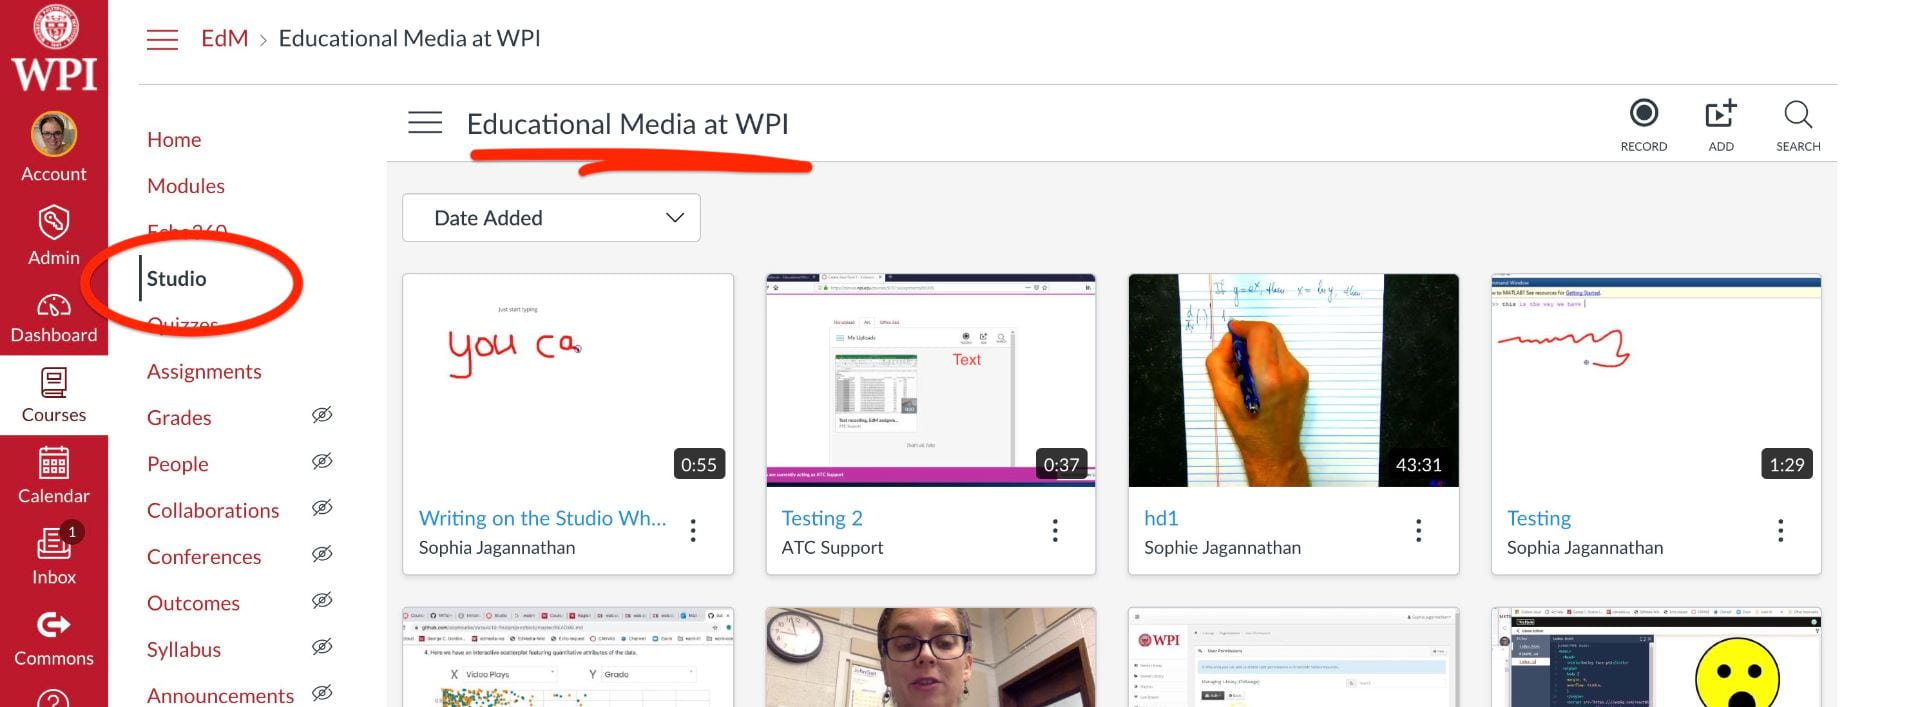
And you’ll also notice that it lands on the set of videos deployed for your course. My course is “Educational Media at WPI”, and I’ve already allocated videos to this course. That’s the first place Studio goes.
But we don’t want to be at this place. We want to be at the general library for you as a user. So let’s go there. To get there, click the three-lined “hamburger” menu to the left of your course name (inside the Studio window – next to where I’ve underlined “Educational Media at WPI”, above). This releases a drop down with all the possible folders in which your content can be placed.
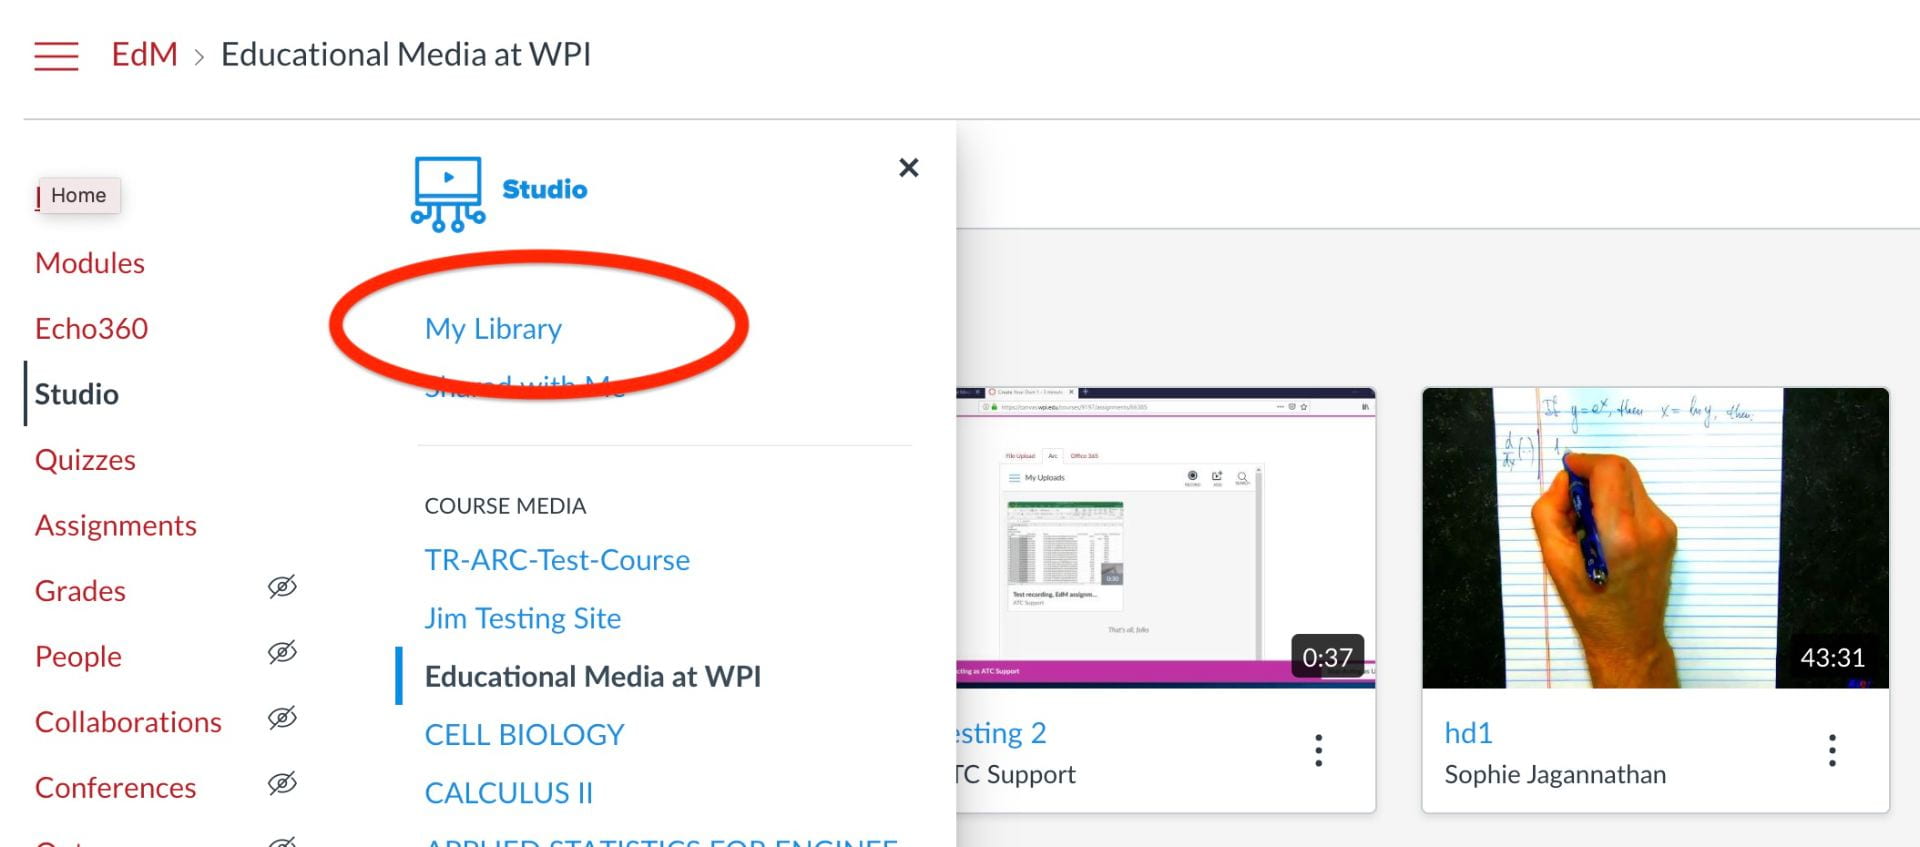
My Library is where you want to go. Click on it.
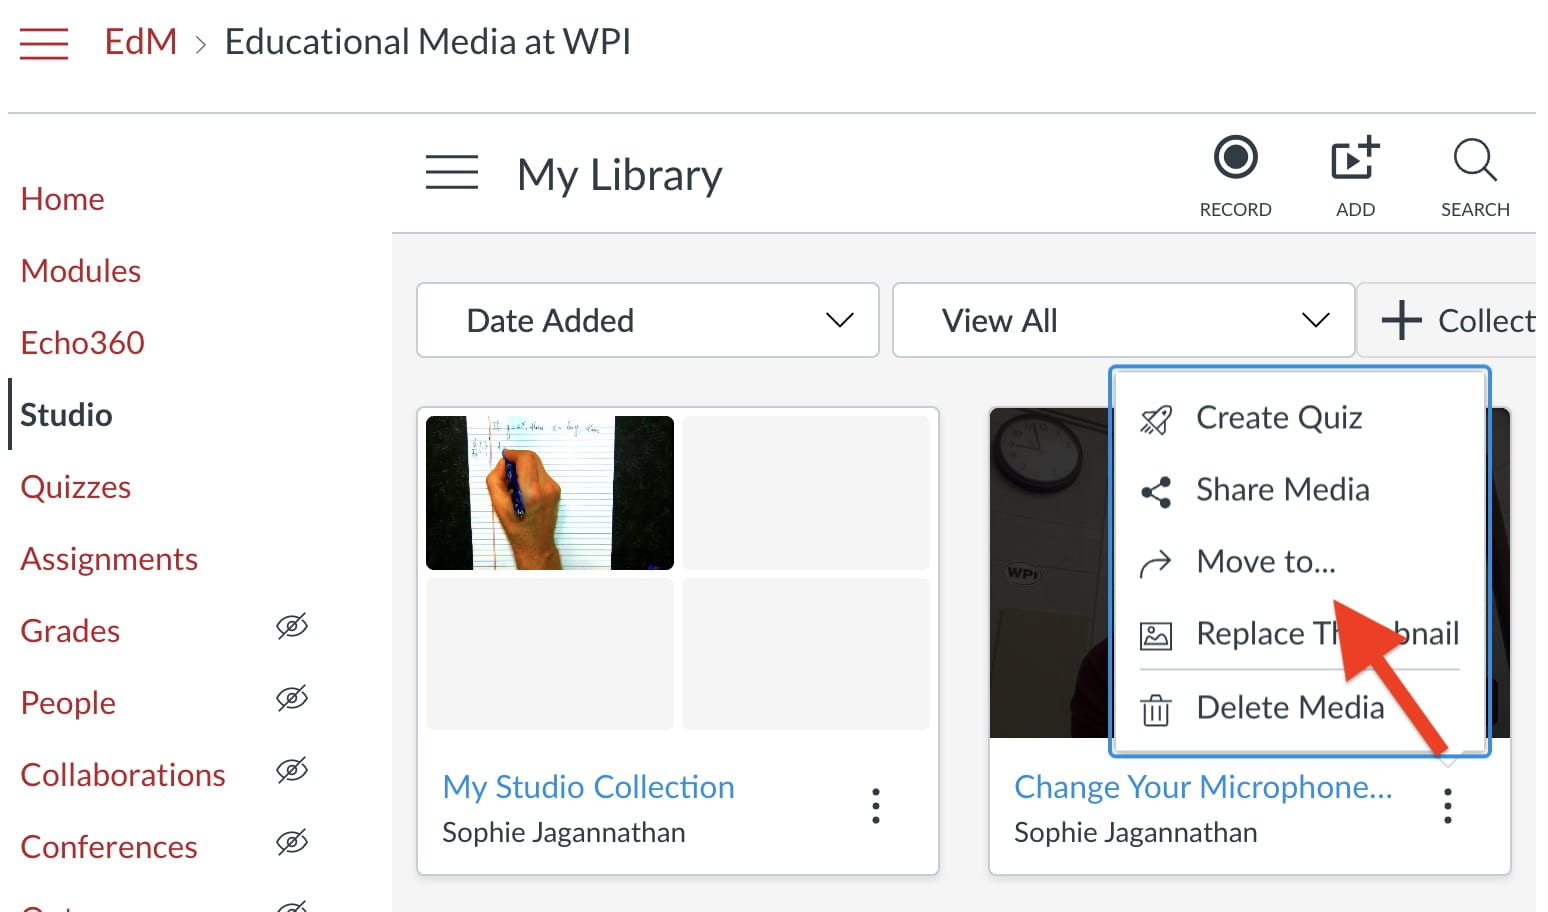
Now you’ll see all the videos you’ve uploaded and created in Canvas Studio. I want to create a collection of videos that’s relevant to instructors who want to record their lectures in a classroom. So I want to move my “Change Your Microphone Frequency” video to a such a collection.
By clicking on the three vertical dots to the right of the video’s title, I see that there’s an option to “Move to”. That’s what I click on.
Now, Studio is basically saying, “Where do you want to move it to? Do you want to make a new collection?” And to this, I say yes!

Channeling my creativity, I name my collection as “My Studio Collection”.
Clicking “move” moves my “Change Your Microphone Frequency” video to My Studio Collection.
But how do we know this for sure? Can we check that it’s made it to my collection? Yes. Let’s go back to My Library.
In My Library, you can see that it’s possible to filter the videos according to date and collection. Or you can click on the thumbnail for the collection.
Below, you can see the results of clicking on My Studio Collection. Here we go.

Notice that the arrow is pointing to the three vertical dots on the right.
Here is where you have options to share your videos with colleagues or students. There are different permission levels available, as the screenshot below shows.
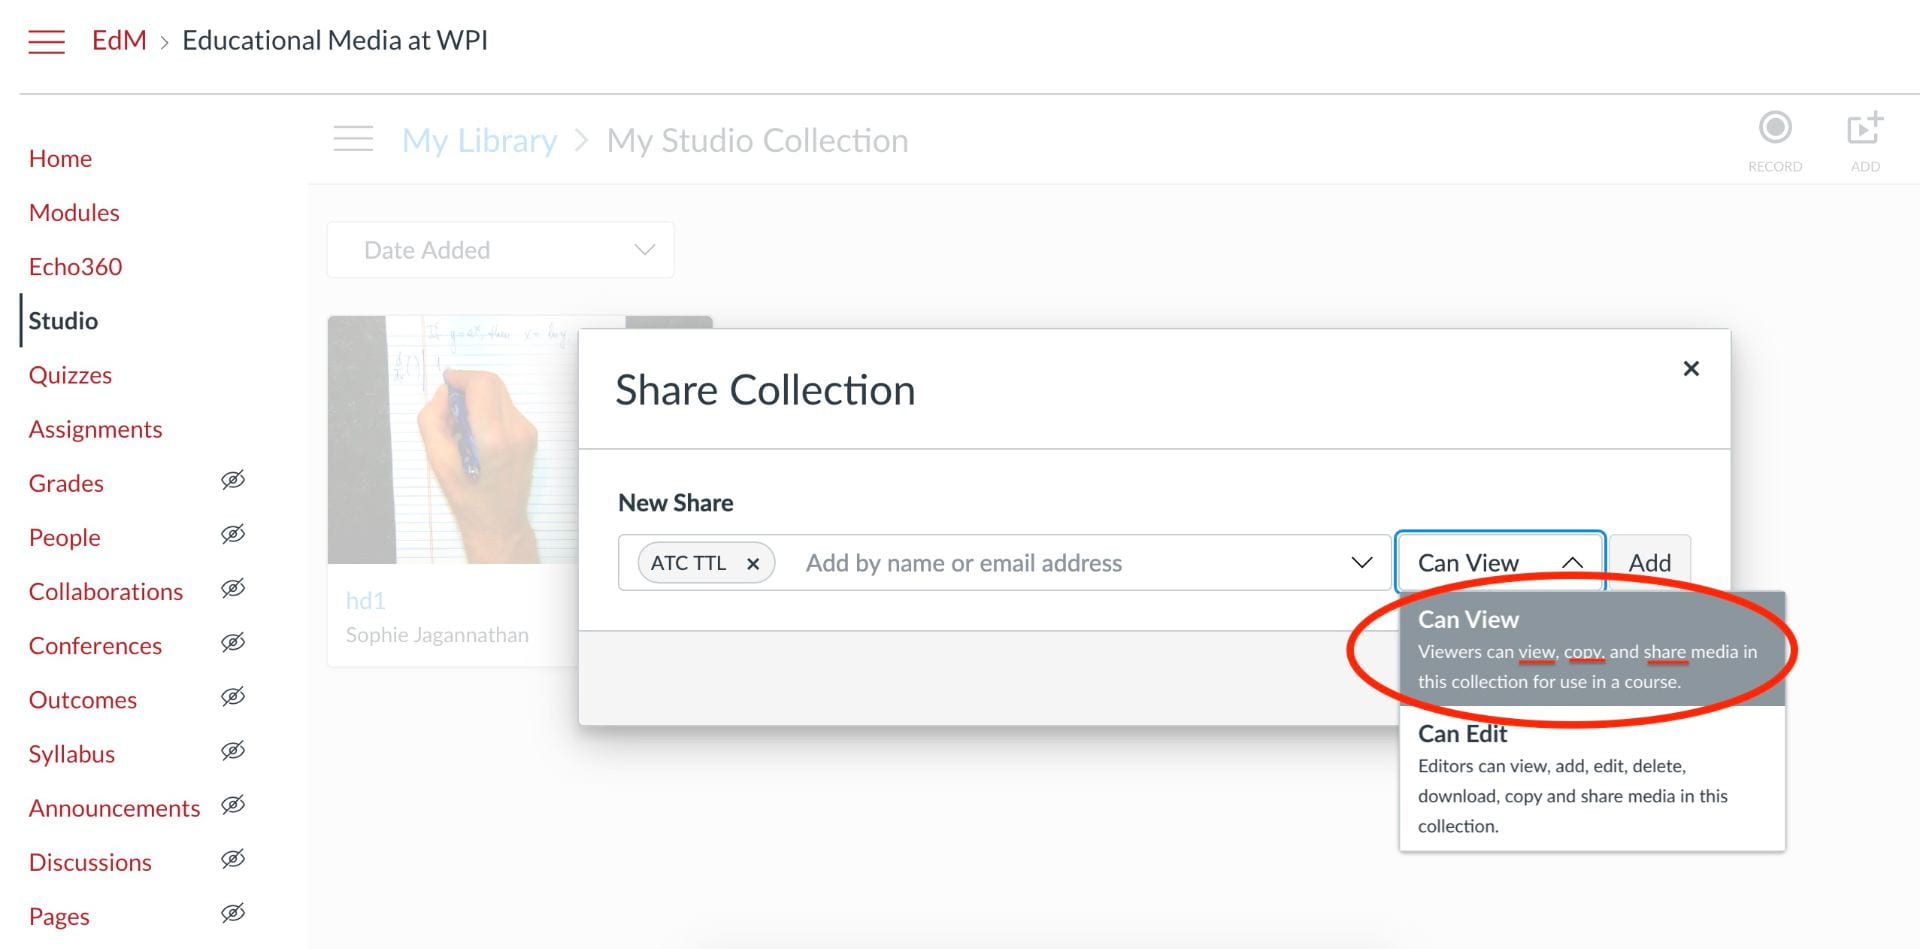
The distinction between the View and Edit permission levels is that while everyone can view, copy and share media, only those who Can Edit can, well, edit, as well as delete and download.
And this is how you create a topic relevant collection of videos from your library of videos in Canvas Studio and share them as you see fit.
If you have any questions about Studio collections, please email us at atc-ttl@wpi.edu. We look forward to hearing from you!