- Act III Scene I: Adding Color (November 16, 2015)
- Slideshow Test
- “Bawawethu” (December 3, 2015)
- Social Enterprise
- Acronym Dictionary
- Background
- About CTPC
- Blog
- Resource Library
- Welcome!
- Projects
- Projects Overview
- 2015
- Expanding Early Childhood Development Opportunities in an Informal Settlement
- Exploring New Outreach Models for Early Childhood Development
- Fostering Community at the Canterbury Street Lot
- Background Research
- Philosophy Behind Helping the Homeless
- Belonging and its Psychological Impact on Street People
- Establishing Social Inclusion in the Street Community
- Understanding Homelessness’ Role in Urban Development
- Investigating the Effect of Public Spaces on Cities
- Creating a Sense of Community Through Green Areas
- Commemorating the Street Community’s Lives
- Partnerships
- Planning
- Outcomes
- Resources
- Background Research
- Providing More than a Meal at Service Dining Rooms
- Upgrading the K2 Informal Settlement through Community Collaboration
- Background Research
- Planning Pages
- The Partnership
- K2 Journey
- Act I Scene I: New Beginnings (October 22, 2015)
- Act I Scene II: Getting lost in the K2 Maze (October 23, 2015)
- Act I Scene III: The Outsiders (October 26, 2015)
- Act II Scene I: Touring Tuesday (November 10, 2015)
- Act II Scene II: Trouble in K2 (November 16, 2015)
- Act III Scene I: Luncheon: A Change of Scenery (November 17, 2015)
- Act III Scene II: Adding Colour (November 20, 2015)
- Act III Scene III: “Bawawethu” (December 3, 2015)
- Act III Scene IV: Financial Contribution: One Step at a Time (December 7, 2015)
- Project Outcomes
- Project Resources
- References
- Women’s Empowerment through Increased Access and Understanding of Technology
- Background Research
- Partnership
- Planning
- Process Narrative
- Outcomes
- Project Resources
- References
- 2014
- Empowerment through Improving Facilities at the Sizakuyenza Safe House
- The Big Issue Goes Online: Creating a Vendor-Run Profiling Program
- Early Childhood and Community Development in Flamingo Crescent
- Background Research
- Challenges of Early Childhood Development in South Africa
- Crèche Regulations and Finances
- Best Practices for Crèche Development
- Determinants of Crèche Quality
- The Effect of Playground Design on Child Development
- The Effect of Playground Design on Communities
- Developmental Benefits of Recreational Space
- Public Space Inequality in South Africa
- Recyclable Playgrounds
- Flamingo Crescent Informal Settlement
- Planning and Methods
- The Partnership
- The Play by Play
- Project Outcomes
- Resources
- Background Research
- An Entrepreneurial Initiative for Distributing Energy Efficient Products in Low Income Communities
- Background
- Planning
- Partnerships
- Project Narrative
- Act 1: Adapting our Project
- Act 2: Finding Distribution Centers
- Scene 1: Creating Interest in Wonderbags
- Scene 2: First Trip to an Informal Settlement
- Scene 3: Looking for New Products
- Scene 4: Gathering Community Energy and Crèche Information
- Scene 5: A Visit to Flamingo
- Scene 6: Just Do It: Three Crèche Visits
- Scene 7: The Reality of Low Income Areas
- Scene 8: A College for Kiddies
- Act 3: Establishing Pilot Programs
- Scene 1: Pilot Program
- Scene 2: A Second Pilot Program
- Scene 3: Sustainable Sales
- Scene 4: Low Income Energy Services Task Team Meeting
- Scene 5: Lunch at the Crèche
- Scene 6: Exploring Other Products
- Scene 7: Graduation
- Scene 8: Enjoying Electricity
- Scene 9: Collaboration for Future Implementation
- Scene 10: Keep Smiling
- Epilogue
- Outcomes
- References
- Expanding Health, Education, and Wellbeing Services and Analyzing the Effects of Underlying Social Complexities on WaSH-UP
- Background Research
- Mission & Objectives
- Cast of Characters
- Process Narrative: Our Journey
- Project Outcomes: Not Just Toilets Anymore!
- Epilogue
- WaSH-UP Sustainable Livelihoods and Business Operations
- Mission and Objectives Overview
- Background Research
- Informal Settlements in South Africa: Langrug Community
- Shared Action Learning (SAL)
- Community Assets
- What Business Institutions/Models Would Best Serve the Community?
- How to Start a Small Business in Informal Settlements
- Possible Models for Small Businesses and Savings Groups
- Ethical Considerations
- Research Questions
- Sources and References
- The Partnership
- Acts and Scenes
- Project Outcomes
- Reflection and Growth during the IQP Journey
- 2013
- Blue Sky Recycling Programme
- Community Mobilisation Through Reblocking in Flamingo Crescent
- The Partnership
- Welcome to Flamingo Crescent
- Background Research
- Methodology: Shared Action Learning
- Project Narrative
- Act 1: Trial and Error
- Scene 1: First Meeting with Levona
- Scene 2: An Introduction to 7de Laan
- Scene 3: Beginnings of Turmoil
- Scene 4: Finding Hope
- Scene 5: A Motivation for our Work
- Scene 6: Red Hill Settlement Tour Highlights Opportunities
- Scene 7: City Mission Visit Illuminates the Option of Reblocking
- Scene 8: Meeting the Key Planners
- Scene 9: First Weekly Meeting Causes Confusion
- Scene 10: Subcouncil Meeting Eases Worries
- Scene 11: A Raw and Unexpected Story
- Scene 12: Ethiopian Experience
- Scene 13: Shack Demolition
- Scene 14: Engineering the Future
- Scene 15: Public Meeting in 7de Laan
- Act 1 Reflection
- Act 2: Testing the Waters
- Scene 1: A Taste of Flamingo
- Scene 2: Getting to know the Community Leaders
- Scene 3: Cluster Meetings in Flamingo
- Scene 4: Introduction to Mtshini Wam
- Scene 5: Kuku Town Visit Provides Example
- Scene 6: All Parties Come Together
- Scene 7: Library Networking
- Scene 8: Communication and Enumeration
- Act 2 Reflection
- Act 3: Taking Care of Business
- Scene 1: Meeting the Contractors
- Scene 2: Breaking Ground
- Scene 3: If You Build It They Will Come
- Scene 4: Visiting ELRU Opens Doors for a Crèche in Flamingo
- Scene 5: A Living Virtue
- Scene 6: Meeting a New Potential Stakeholder
- Scene 7: Meeting with the CECD: “Let’s do it.”
- Scene 8: Bringing Green Innovation to the Crèche
- Scene 9: Final Stakeholder Meeting
- Scene 10: Saying Goodbye to Flamingo Crescent
- Act 3 Reflection
- Student Reflections
- Act 1: Trial and Error
- Resources and References
- Community Mobilisation Through Reblocking: An Interactive Upgrading Anthology
- Early Childhood Development Connection
- MGV Park Redevelopment
- Project Partners
- Project Outcomes
- Background Research
- Planning and Methods
- Process Narrative
- Act 1: The Beginning
- Scene 1: Arriving in Maitland Garden Village
- Scene 2: First Sight
- Scene 3: Meeting with the Project Members
- Scene 4: Community Survey
- Scene 5: Working with Co-Researchers
- Scene 6: Village Day
- Scene 7: Monday’s Meeting with Jude
- Scene 8: Monday’s Meeting with Co-Researchers
- Scene 9: Discouraging Moment
- Scene 10: Setting up the Fantasy Playscape Activity with the Crèche
- Act 2: A New Hope
- Act 3: Getting the Ball Rolling
- Personal Reflections
- Act 1: The Beginning
- Resources
- WaSH-UP
- 2012
- Capacity Building of a Community Based Organisation in Maitland Garden Village
- Meet the Team
- Background Research and Preparation
- Ethical Considerations
- Cape Town Project Centre Context
- Sponsors
- Project Work on Site
- Cast of Characters
- Meetings
- Organisational Profiles
- Act 1: Finding our Footing
- Scene 1: First Encounter with Maitland Garden Village (MGV)
- Scene 2: Tour of Maitland Garden Village
- Scene 3: Ronell’s Sight into the Help Centre
- Scene 4: First Look at the Potential Venue
- Scene 5: Getting to Know the People We are Working With
- Scene 6: Tour Of Oude Molen
- Scene 7: Village Day
- Scene 8: Monday Morning Meeting
- Scene 9: Meeting at MGV Community Centre
- Reflection and Moving Forward
- Act 2: Building Support
- Act 3: Strategy and Execution
- Envisioning a Black River Pathway: Creating a Heritage Destination through Social Development
- Research & Planning
- Cast of Characters
- Ethical Considerations
- Acts and Scenes
- Act One: Getting Started
- Scene Eight: Maitland Garden Village Day
- Scene Five: Faces of Oude Molen Eco Village
- Scene Four: First Meeting with our Sponsors
- Scene One: The First Pathway Experience
- Scene Seven: Visiting Company’s Garden
- Scene Six: A Presentation to our Sponsors
- Scene Three: Walking the Desire Lines
- Scene Two: Tour of Maitland Garden Village
- Act Two: Developing Relationships
- Act Three: Absorbing Information
- Act Four: Meeting with the City
- Act Five: Wrapping Up
- Act One: Getting Started
- Resources & References
- Laying the Foundation for a Resilient Partnership: Innovative Upgrading in the Informal Settlement of Langrug
- Welcome to Langrug
- Background Research
- Cast of Characters
- Primary Project Focuses
- Acts and Scenes: Our Observations and Reflections
- Act 1: Jumping Right In
- Act 2: Planning and Moving Forward
- Discussing the Needs of the Community and How the MPC Can Help
- Making the Decision to Move Forward with the Multi-Purpose Centre
- Reblocking Guidebook Discussion
- Re-Measuring for Reblocking
- Spacing Out ReBlocking
- Fire In Zwelitsha
- Lunch Scene
- Working Team Arguments
- Playing Games
- Introductions at the Municipality: A Revelation
- Amanda Realises the Importance of Documentation
- The Working Team Presents to the Municipality
- How Simple Office Supplies Can Spark Progress
- Further Difficulty with Planning
- Learning How to Do (and Teach) a Cost Analysis
- Act 3: Making Decisions
- Working Group Expresses Community Urgency
- Impromptu Meeting with Dawie
- Meeting with Scott: Ending a Day of Confusion
- Partnership Meeting 13 November
- Alfred’s Presence in Langrug
- Realising the Greywater Cleaning Problems
- Working Group’s Apparent Lack of Trust in the Municipality: Putting Together a Report
- Tensions Regarding Community Contributions and the MPC
- Act 4: WaSH Construction
- Act 5: Our Reflections
- Rooftop Gardens for Sustainable Livelihoods in Cape Town
- Supporting Reblocking and Community Development in Mtshini Wam
- Capacity Building of a Community Based Organisation in Maitland Garden Village
- 2011
- Addressing Greywater Management Issues in Langrug Using a Sustainable Reiterative Process
- Black River Corridor: Visions for Restoration and Recreational Use
- Envisioning the Future Development of Oude Molen Eco Village
- Supporting Asset Based Community Development in Maitland Garden Village
- Chapter 1: What is the best way to aid a community in a sustainable and positive way?
- Chapter 2: How does one lay the foundation for a mutually beneficial relationship?
- Chapter 3: What communication tools can be utilised to gauge a community’s aspirations?
- Chapter 4: What is the best way to show gratitude and initiate community driven action?
- Chapter 5: What is the best approach to gain governmental participation in preparation for a community programme?
- Chapter 6: How do you structure a meeting so the attendees become participants and truly invested?
- Chapter 7: How can MGV continue to develop through mutually beneficial relationships with neighbouring communities?
- Epilogue: What does the future hold?
- Acknowledgements
- Team Interviews
- Photo Gallery
- Downloads and References
- Sustainable Livelihoods Through Beekeeping
- WaSHUp: Innovating Water Sanitation and Hygiene Upgrading in Langrug
- Langrug
- Meet the Team
- Water and Sanitation in Langrug
- Mapped Facility 1
- Mapped Facility 10
- Mapped Facility 2
- Mapped Facility 3
- Mapped Facility 4
- Mapped Facility 5
- Mapped Facility 6
- Mapped Facility 7
- Mapped Facility 8
- Mapped Facility 9
- Mapped Facility 11
- Mapped Facility 12
- Mapped Facility 13
- Mapped Facility 14
- Mapped Facility 15
- Mapped Facility 16
- Mapped Facility 17
- Mapped Facility 18
- Mapped Facility 19
- Mapped Facility 20
- Mapped Facility 21
- Partnerships in Langrug: A Model for the Future
- Community-Driven Development
- Community WaSHUp Spaces
- Multi-Purpose WaSHUp Facility
- Future
- Supplemental Material
- 2010
- Profiling Community Assets
- Collaborative Construction
- Stormwater Management
- Strengthening Spaza Shops
- Supporting Early Childhood Development
- Initiation Site Development
- Meet the Team
- Project
- Good Hope Initiation Site Proposal
- Objectives
- Background
- A Historic Perspective of the Initiation Ritual
- Challenges of Initiation
- Limited Physical Space and Lack of Seclusion
- Building and Burning of Initiation Huts
- Challenges of Initiation in an Urban Environment
- Economic Challenges for Initiates
- Health Concerns during the Initiation Process
- Malnutrition during the Seclusion Period
- Psychological Challenges Faced by Initiates
- Conflicts Between Traditional Leaders and Authorities
- Government Actions in the Initiation Community
- Methodology
- Project Resources
- Acknowledgements
- Co-Researchers
- 2009
- Buildings
- Communications
- Economy
- Energy
- Gardens
- Mapping and Planning
- Water & Sanitation
- Accomplishments
- Background
- Current Conditions and Common Practices within Monwabisi Park
- Establishing Collaborations
- Future Testing
- History of Water and Sanitation in South Africa
- Learning by Example: Case Studies
- Meet the Team
- Methodology
- Monwabisi Park as a Model for Redevelopment
- Our Partners
- Project Resources
- The Sanitation Centre
- 2008
- 2007
- Contact Us
- Communications
- WaSH
- First Week Plans
- Pre-Travel Planning
- Interactions
- Meeting Strategies
- Shared Action Learning
- Mission Statement and Objectives
- Methodology
- Ethics
- Interview Planning
- Week One Plan
- Beyond Week One
- Cast of Characters
- Welcome to Langrug
- Key Areas of Focus
- References
- CTPC Context
- Setting the Stage
- Sponsor: Community Organisation Resource Centre
- Sponsor: Department of Integrated Human Settlements
- Cast of Characters
- Project Planning
- References
Building Guide: Step-By-Step
Repairing the Roof
- Removed masonite panels.
- Removed light and light wire.
- Removed ceiling molding.
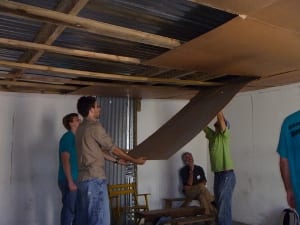
Removing Panels
- Introduced bracing system for roof framing.
- Removed roofing nails from tin on roof.
- Removed all zinc from framing.
- Removed and de-nailed old supports.
- Collaborated with community members on new framing plan.
- Set up and leveled high brace on back wall.
- Temporarily placed and marked cut outs on main beams.
- Constructed main beam with notches.
- Raised, and nailed main beam in place.
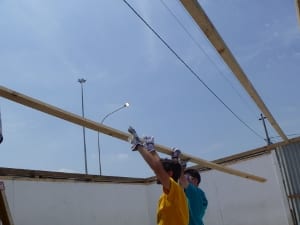
Installing Main Beam
- Installed side supports to provide security.
- Installed rear support.
- Determined rafter spacing. (90cm center to center)
- Marked rafter locations.
- Cut and installed rafters.
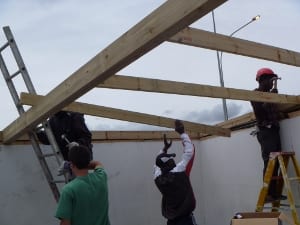
Installing Rafters
- Put up ledger boards under rafter.
- Began scabbing the outside.
- Carried initial sheets of zinc onto the roof with a 2 groove overlap.
- Marked position of rafters on zinc using a pencil and straight-edge.
- Secured zinc sheets around edges to temporarily hold.
- Repeated steps 22-24 until roof was covered with zinc sheets.
- Secured zinc sheets with screws placed every two ridges.
- Secured edges where flashing will be with nails.
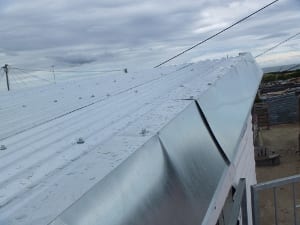
Flashing
- Cut zinc pieces using a wire.
- Used these pieces to fill gaps on the sides of the building created when the roof was raised during construction.
- Installed additional support for main beam on the north wall.
- Finished installing zinc panels on exterior to cover exposed wood.
- Measured exposed area.
- Cut needed pieces of zinc with angle grinder.
- Nailed pieces into place.
- Nailed ends to rafters, following with the interior connections.
- Trimmed edge of the roof to make room for flashing.
- Marked correct straight edge with chalk line.
- Used grinder to remove excess material.
- Trimmed beams with handsaw.
- Installed flashing from on top of the roof.
- Hoisted flashing to rooftop.
- Held in position.
- Secured with roof screws.
- Put next piece into place, ensuring proper overlap.
- Repeated the process.
- Cut off some of the flashing around the electrical wires using steel wire.
- Finished flashing by securing all of the flashing to the side of the building.
- Drilled pilot hole.
- Bolted in the flashing with screwed.
- Installed masonite panels.
- Nailed masonite panels on the edges and in the middle where it lines up with the braces that were installed.
New Light and Masonite
- Nailed masonite panels on the edges and in the middle where it lines up with the braces that were installed.
- Filled in holes of zinc sheets on roof with silicone.
Mending the Gap in the Back Wall

Before and After of Back Wall
- Replaced the gap in the back wall.
- Remove extra trim pieces
- Sister in lumber to provide mounting point
- Trim existing wall to create straight edges
- Measure and cut plywood to fit in the open space
- Secure plywood in open space
Fixing the Doorframe and the Door Lock

Before and After of the Door
- Removed door from doorframe.
- Measured new door location.
- Marked off new hinge locations, and new top of doorframe.
- Measured and cut lumber to fill in gaps in doorframe.
- Nailed in pieces.
- Removed door handle assembly.
- Installed new assembly.
- Remounted door.
- Made adjustment to threshold.
Fixing the Damaged Floor

Before and After of the Floor
- Leveled sand in hole.
- Wet the sand.
- Mix two bags of 40kg concrete with water until desired consistency is reached.
- Place the concrete in the hole
- Aggregate and level the concrete using a piece of wood and a trowl
Installing a Second Light Socket and a Light Switch
- Installed wiring for two lights and added a switch next to the door.
- Turn off breaker
- Open outlet receptacle box
- Wire a switch lead in parallel to the existing outlets
- Install a switch box by the door to the hall
- Connect the switch lead to switch
- Run wire from switch to first light bulb
- Ran wire along wall and rafters where appropriate
- Drill holes through rafters when needed
- Secure the wires to the rafters with staples
- Repeat for second light bulb and connect it in parallel
- Installed the two lights.
- Drill hole in masonite panels for the light.
- Snake wire through the hole in the masonite using steel wire to pull it through.
- Remove outer casing approximately 15-20 cm from the end of the wire.
- Removed casing from the ends of individual wires.
- Attached ends to their respective terminals on the bulb base.
- Screwed the bulb base into place.
- Attached light bulb to the bulb base.
- Repeat for the second light.
Repairing Burglar Gate
- Removed current gate assembly.
- Refastened burglar gate.
- Close the door and held the gate in place.
- Marked and made necessary cuts to allow the gate to fit flush to the doorframe. Secured with lag bolts.
Constructing Benches
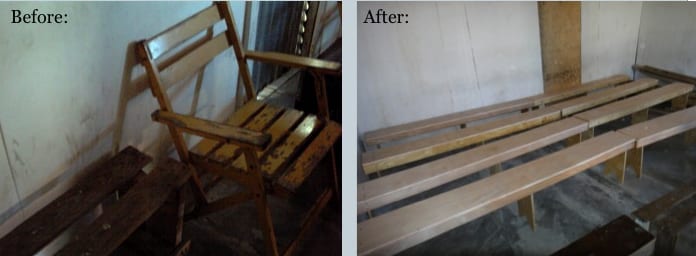
Before and After of Benches
- Measured every 30cm on the finished shutter plywood for the bench seats.
- Used the chalkline to mark the boards for cutting.
- Cut the boards using a skilsaw.
- Measured 50cm x 28.8cm on pine plywood for the legs of the benches.
- Used the chalkline to mark the boards for cutting.
- Cut the boards using a skilsaw.
- Cut out a triangle piece from each leg that is ?cm x ?cm located in the center of the piece.
- Marked the bench top to place struts that are 8cm x 220cm.
- Connected legs to the bench tops.
- Attached the struts.


